Showing posts with label recipe. Show all posts

Tuesday, 6 August 2013

Nankhatai - Indian Spiced Biscuits


One of my favourite recipes from my Indian Afternoon Tea last weekend was Nankhatai - they are the perfect cup of tea biscuits and are very easy to make. You can customise them with different spices and once they are baked, different toppings.

Nankhatai can be found in most Indian bakeries and sweetmarts, they usually bake with a cracked top but I couldn't achieve this - I'm not sure what the technique is - but they tasted just as good!

Nankhatai are eggless biscuits, a lot of Indians don't eat eggs for religious reasons which is why they are such a popular baked good in India. They contain a pleasingly large amount of butter, which gives them their melting soft texture and makes them very moreish.
My biscuits are flavoured with cardamom and saffron and I topped them with chopped pistachios (bound with a little runny honey to stop them falling out), and some of them cumin seeds, which I love with sweet things.

Nankhatai - makes about 30 biscuits (easily halved)

100g softened butter
100g icing sugar
1/2 teaspoon baking powder
Pinch of saffron
3 pods worth of black cardamom seeds - ground finely
250g plain flour
20g gram flour / chickpea flour
30g coarse semolina
Pistachios or other nuts to decorate.

Preheat your oven 160c / gas mark 4
Cream together the butter and sugar til smooth.
Add in your spices and baking powder and stir briefly
Sift in your flours, mix with a wooden spoon first and then as it comes together use your hands to form a dough - it will be quite soft.

Line or grease a couple of large baking trays and then make 1 inch balls out of the dough and place on the sheet. They should be fully round, don't flatten otherwise you won't get lovely rounded biscuits at the end.

Once you've got all the dough balls ready press into the middle to create a small hole, being careful not to flatten them. I used a velun (a rolling pin for rotli) - you could use the end of a tablespoon very carefully to do this.

Bake for 15 minutes til they are only just a little golden on the edges. Remove from the oven and then add your pistachios or other choice of topping - other nuts work well, as does desiccated coconut, or when they are cool you can add chopped chocolate.

They keep very well for a few days in an airtight tin stored at room temperature. I recommend you have them with a cup of masala chai!

Pin It

Friday, 24 August 2012

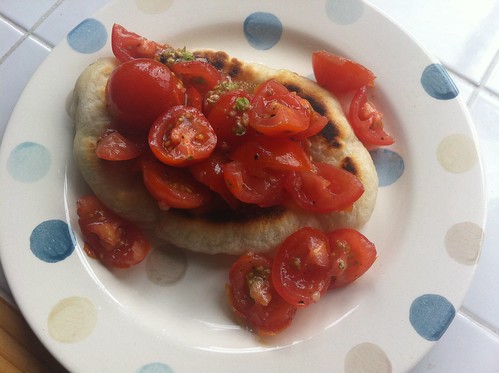
Tomato Bruschetta


So who else, whilst watching Celebrity Masterchef this week, thought - who boils tomatoes for bruschetta and removes the skins? I always thought the idea was to use fresh tomatoes?

Anyway, despite that, I really fancied some nice basil and olive oil spiked tomatoes after watching it. Here is a confession - my tomatoes which should have been some locally grown fresh summer tomatoes were actually from Tesco. Sorry, are my blogger credentials ruined?

Anyway, I used some cherry tomatoes which are sweeter than the normal sized ones and gave them some help with decent olive oil and basil from my garden. So I think I win a bit more because I grew the basil myself? I finely chopped and then crushed into a paste with the knife some garlic and added that, with plenty of seasoning.

Instead of the traditional ciabatta I used some pizza dough I had in the fridge to make pizza fritta. This is a pretty unhealthy but awesome way of making pizza, I got the recipe from Jamie Oliver's 'Jamie at Home' book. Basically you fry it in olive oil on both sides til it fluffs up - then add toppings and grill to melt the cheese. For this I just topped with tomatoes and served it up.

This was a perfect indulgent but light lunch and the extra flavourings from basil and garlic pimped up (sorry been reading too much Joliver) some ordinary tomatoes. I will try it with some 'proper' local tomatoes soon, I'm sure it will be amazing!

Pin It

Tuesday, 24 April 2012

Oat & Peanut Butter Sandwich Cookies


I think this recipe is the fastest read to bake ratio on the blog yet. Joy the Baker blogged this lovely recipe on Thursday and I was in the kitchen making them on Sunday. I think I would have been quicker had my car not broken down on Friday (I'll save moaning about that for my Twitter account!).

I've been searching out the Peanut Butter Co. peanut butter for a while. They are based in New York and make natural peanut butter without all the scary preservatives and palm oil that most producers use (even brands made in the UK which doesn't use as much palm oil as the States).
Sainsbury's stocks the smooth peanut butter, they have lots of different flavours (cinnamon raisin swirl! dark chocolate dreams!) so I am hoping they get more popular here and start stocking more.


These cookies are so great, I always have success making oaty cookies and these were no exception. They have tons of flavour, lots of crunch from hazelnuts and that amazing peanut butter filling. I used a touch less sugar in both the cookie mixture (2/3 cup) and added icing sugar to taste, I don't like cookies too sweet as I like to taste the rest of the ingredients.

I made up the whole batch of dough according to the recipe, but only baked half, I saved the rest and froze them in little balls in the freezer - ready for future cookie cravings! I do this a lot with cookies as we can't eat such big batches ourselves, and it is nice having cookie dough in the freezer. I made half the icing for my half batch of cookies.

Oatmeal & Peanut Butter filled Sandwich Cookies
From Joy The Baker, makes about 24 cookies.
100g / 4oz unsalted butter, softened
2/3 cup of brown sugar
1 large egg
1 teaspoon of vanilla extract
1 1/4 cups of porridge oats
1 cup of plain flour
1 1/2 teaspoon of baking powder
1/2 teaspoon of salt
1/2 teaspoon of cinnamon
few grinds of black pepper (Mr doesn't like nutmeg so I gave this a go and it worked!)
1/2 cup of chopped hazelnuts

Peanut Butter Filling (this is the whole batch, half if you are freezer stashing your dough!)
3 tablespoons of butter, softened
1/2 cup of good quality smooth peanut butter
1 cup of icing sugar
1 teaspoon of vanilla extract
3/4 tablespoons of milk

Preheat the oven to gas mark 4 / 180c.

Cream the butter and sugar in a large bowl or mixer, add in the egg and mix to combine, add in the vanilla extract and combine.

Mix the oats, flour, baking powder, salt and spices in a separate bowl. Then adding a bit at a time fold in the dry ingredients with the butter mixture. Be careful not to overmix. When it is all incorporated stir in the nuts.

Prepare a flat baking sheet by lining it with baking parchment. Scoop out teaspoon size bits of dough, roll into a ball and place on the sheet 1.5 inches apart. Bake for 10 minutes for soft chewy cookies and 13 minutes for crispier cookies. Bake in batches if you don't have room.

For the filling:
Put the butter, peanut butter and vanilla in a bowl and cream together. Add the icing sugar in batches. I added in half first and mixed, tasted for sweetness and added more to taste. To get a creamier icing that is spreadable add in splashes of milk to the icing.

When the cookies are cool enough (leave in the tray for 5 minutes and then cool on a wire rack for 10 - 15 minutes) spread the icing over each underside of the cookie and then sandwich. Place in mouth. Place another one in your mouth. Make a cup of tea and dunk that cookie in it!

I'm really quite smug that I have another 12 cookies to be in my freezer.

Pin It

Sunday, 15 April 2012

Slow Cooked Chipotle and Ancho Pork


These days my diet is mostly vegetarian, but every now and again I do get cravings of the carnivorous variety that just won't go away. This slow cooked pork is fragrant with cumin and coriander with some gentle heat from chipotles in adobo and powdered ancho chilli, brought together by a thick tomato and onion based sauce. I made various sides to go with this - onions pickled in vinegar, guacamole, grated cheese and also black beans to please the vegetarian in our household - and then piled it on to little tacos.

A word about tacos and tortillas here. I find the majority of tortilla wraps just awful, they are kind of plasticky and don't really taste of anything at all, proper Mexican tortillas they ain't. If you can pick up some better quality tortillas or have time to make your own then everything will taste all the better. I've been using the square wraps Warburtons bought out recently, they are more bready and less plasticky and just taste a bit more real. For the tacos I just used a cookie cutter to make little rounds.

Slow Cooked Chipotle & Ancho Pork
based on a recipe from Food 52, with different chillies.
serves 2  (or one greedy person with leftovers)

1 tsp of cumin seeds
1 tsp of coriander seeds
350g of pork shoulder, cubed
1/2 onion, diced
1/2 red chilli, diced
2 cloves of garlic
about 1 inch piece of dried ancho chilli, finely chopped or blitzed in a food processor
1/2 chipotle in adobo plus a bit of adobo sauce
2 tsp of dried oregano
1/2 can of peeled plum tomatoes
1 pint chicken or vegetable stock
oil for frying
fresh coriander

Heat up a large casserole dish on the hob. Toast the cumin and coriander seeds for a few minutes, keep them moving so they don't burn. Transfer to a pestle and mortar and crush the seeds. Heat some groundnut or sunflower oil in the dish and brown the pork on all sides, do this in batches if it doesn't fit. Season the pork whilst it is browning. Put the pork in a bowl and set aside.

Fry the onions next til softened, then add in the chilli and garlic and fry for a minute. Add in your ground spices, dried oregano, ancho and chipotle in adobo. Then add your pork back in and stir everything together, fry for a minute before adding your tomatoes and stock along with salt and pepper. The meat needs to be totally covered with stock, top up with boiling water if it isn't.

Bring to the boil, then cover and reduce to the lowest temperature. Bubble away for at least 2 hours, maximum about 4. When the meat is falling apart and tender it is ready to eat.

Remove the pork from the sauce. Blend up the sauce to help thicken it and then turn the heat up high to reduce the sauce, it should take about 5-10 minutes. Once it is nice and thick add in some fresh coriander and shred the pork and mix into the sauce. I removed the fat when I added the pork back in, I don't like the texture of it when it is cooked like this, and once the pork has slow cooked the fat has done its job to help add flavour to the meat.


Get all your sides ready whilst the sauce is thickening and then pile onto tacos and go!
I'll be having the rest of this pork tomorrow in a burrito and I can't wait.


More and more little delis and farm shops are stocking interesting dried chillies now, and you can find chipotles in adobo in a few places too (Cambridge people - the Cheese Shop sells them). If not you can find all of them at Mex Grocer, including proper tortillas.

Pin It

Monday, 9 April 2012

Pesto Pull Apart Bread


This Pesto Pull Apart Bread is a real crowd pleaser, I think tearing big chunks of freshly baked bread slathered in pesto is just about anyones favourite thing to do. I took this bread along to The Secluded Tea Party Unbirthday this weekend as part of the pot luck spread, along with some sundried tomato palmiers (more on that soon). It looks kind of awesome, all big and gnarly on the table and tastes even more awesome.

This bread takes time time to make but if you are confident enough making a normal bread dough then you'll be fine here. It is quite a nice bank holiday activity, something you potter in and out of the kitchen at regular intervals to do the necessary stages.

I've seen this as a sweet filling before too, filled with cinnamon sugar, and also in other savoury ways - sun dried tomato, cheddar & mustard. 

Pesto Pull Apart Bread
based on the recipe from Miss Igs

For the dough
1 cup of warm water
1 packet (7g) of fast action yeast
2 tablespoons of olive oil
2 cups of strong white bread flour
2 tablespoon of sugar
1 teaspoon salt
1 egg

For the pesto
Large handful of fresh basil
2 cloves of garlic
1/4 cup of toasted pine nuts (toasted in a dry pan)
approx 1/8 cup of grated parmesan or hard cheese
extra virgin olive oil

Mix together the warm water, yeast and oil in a large bowl. Leave for 5 minutes til the yeast starts to bubble.
Then add the bread flour, sugar and salt to the yeast mixture. Mix well with a wooden spoon (or a mixer if you have one, I have one on my wish list!) until all incorporated in to a dough, add the egg in and mix to incorporate again. Your dough might be a bit wet here so add in some more flour to form into more of a kneadable dough. Knead lightly in the bowl for just a couple of minutes. You'll not need to worry so much about kneading if you are using a mixer with a dough hook.


Cover the bowl with a tea towel and leave in a warm, dry place for at least an hour to prove. It should double in size.
You need to make your pesto now. Just blitz all the ingredients in a food processor or mini blender. Add some oil to begin with and then add more as you need to loosen the mixture.

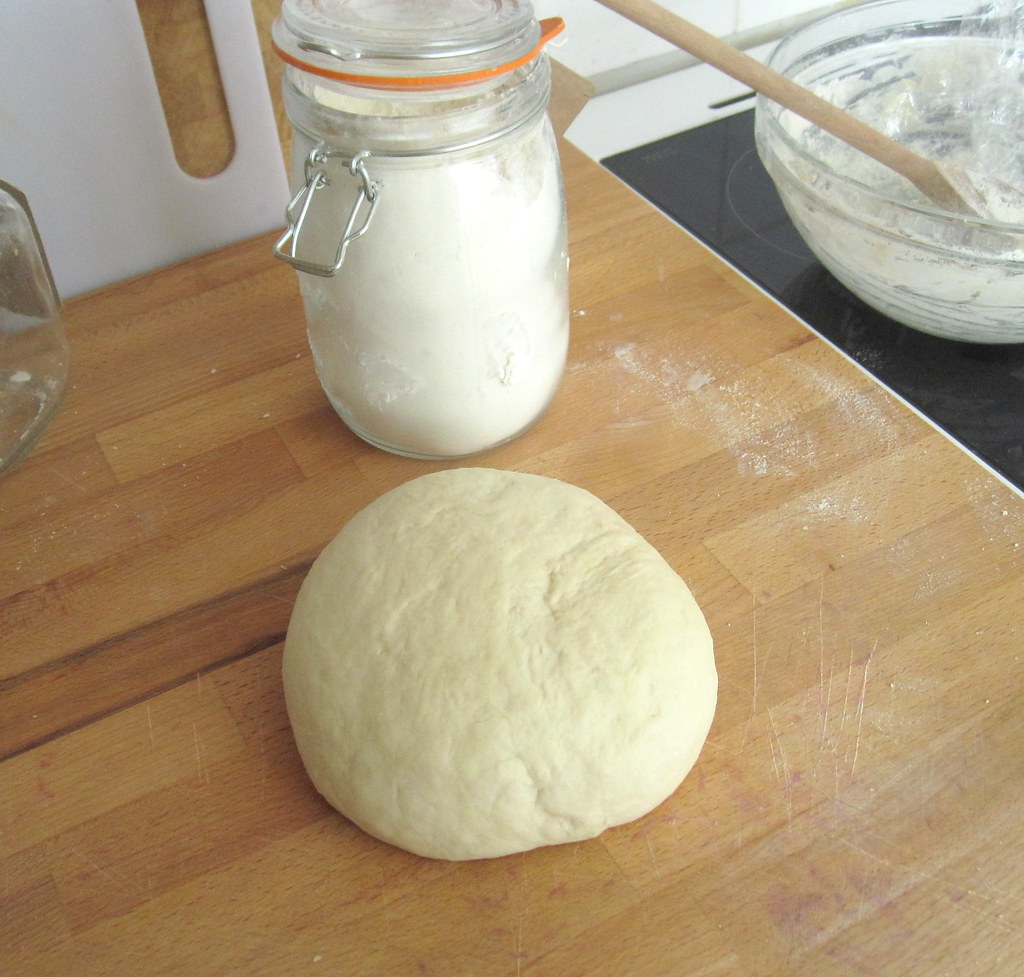
After proving knock back the dough, flour a board well and roll out thinly in a rough rounded square. Spread the pesto over the dough.

Cut the dough into 4 long strips. Then pile the strips on top of each other, then cut into little square stacks. Then stack the little squares into a oiled and floured loaf tin. Leave to prove for another 30-40 minutes.

Preheat your oven to 170c / gas mark 3. When it is proved bake in the oven for 30 - 35 minutes until golden brown and cooked through. Keep an eye on it in case it starts to brown too much, you may need to turn your oven down, mine went quite brown in the end.


Remove from the tin about 5 minutes after it has come out of the oven. Cool on a wire rack. Tear into it when it is still slightly warm / as long as you can bear without eating it.


Pin It

Wednesday, 7 March 2012

Gujarati Recipe Series - Handvo, Savoury Cake


This post marks the first in my series of Gujarati recipes! This is something I've been meaning to start for a long time and I have been encouraged by many of my twitter followers to do so too. I think it is pretty fitting to start off with a cake, but this time a savoury, spicy vegetable cake.

Handvo, or Andvo, is made from chickpea and semolina flour with carrots, peas, onion and sweetcorn, chili and ginger inside with a crispy top with mustard seeds on top. We always used to eat this on Saturday nights, with other snacky food like samosas - although it is a pretty filling meal in its own right.


Handvo
Makes one 18 x 6 cm dish (though will work in slightly bigger or smaller dishes)
You need to start this the day before you want to eat it. 
My cups are American cups, teacups also work well.

Part 1 - the day before
Ingredients
1 cup of coarse semolina flour
1 cup of chickpea (gram) flour
1 tsp of grated fresh ginger
1 - 2 green chillies (to taste)
1 tsp salt
2 tsp sugar
1 cup of natural yoghurt (my Mum said the cheaper the better as you want a nice tangy yoghurt!)
2 tbsp of groundnut, sunflower or mild olive oil
warm water - about 1/2 - 1 cup

Mix together all the ingredients except the water, add the water gradually to loosen the mixture til it is the texture of cake batter. Cover and leave in the fridge overnight (or up to 24 hours) when you want to use it remove from the fridge and bring to room temperature.

Part 2 - the next day
Ingredients
1 1/2 tsp of baking powder 
1 medium onion, diced
2 tbsp of frozen peas
2 tbsp of frozen or fresh sweetcorn
1 medium carrot, finely diced

Add all of the vegetables to the 'cake' mixture plus the baking powder, stir briefly (don't overwork the mix) to combine. Preheat your oven to 180c / gas mark 4. Grease and line your dish and pour in the mixture.

Mustard Topping
1 tsp of black mustard seeds (the yellow ones don't really work as well, try your local asian grocer or health food shop for black mustard seeds)
3 tbsp of groundnut, sunflower or mild olive oil

With your mixture ready in your dish and your oven heated up. Heat the oil in a high sided saucepan on a med/high hob. Put in the mustard seeds and quickly cover the saucepan with a lid. Allow the mustard seeds to pop for about 30 seconds. Turn off and remove from the heat and allow it to cool for about 1 minute. Then pour the oil and mustard seed mixture over the cake mixture in the dish.

Bake for 45 mins - 1 hour in your preheated oven. You want the top to be quite brown, possibly looking a little overdone (I erred on the side of caution here so mine is a bit paler than it should be). 

Handvo is supposed to be served hot so slice up as soon as it comes out of the oven, it is best served with a dollop of good old tomato ketchup! It is also great cold the next day

Am hoping to return soon with more Gujarati recipes, I've got lots of things I'd like to make next. I hope you might make this, its a great recipe to try if you like baking cakes.


Pin It

Sunday, 1 January 2012

Vegetarian Pho

First of all, Happy New Year everyone! Hope you all had a lovely Christmas.


 I've never had Pho before, but I've read lots about it and it seems to be one of those dishes which is amazing and also comes with strict rules about what should be in it. I'd never come across Vegetarian Pho before until I saw it on Miss Igs' blog recently.


Whilst I don't believe detox works, after all the indulgences of Christmas and New Year this is perfect to cut through all the roast dinners, cheese boards and tins of chocolate consumed in such a small amount of time.


This recipe appeals to my organised / neat freak nature as you assemble all the ingredients in to little bowls ready to put together when the broth is done. Some chopped coriander, sliced spring onions, diced chillies, steamed pak choi and thin strips of fried smoked tofu. You can make all this up before serving or lay them out on the table and let everyone garnish as they eat.


Click here for the full recipe on Miss Igs' blog (and lots of other lovely recipes from a fellow Cambridge food blogger).
As mentioned I had shallow fried smoked sesame tofu (lovely, full of flavour) and some steamed pak choi with my Pho. I've got lots of broth leftover too, which I am going to stash in the freezer for a day when I am struck down with a rotten cold.

Pin It

Thursday, 8 December 2011

Beetroot & Goats Cheese Tart


What is the difference between a savoury tart and a quiche? Something I am sure you will all ponder over for many hours...

This is a terribly simple recipe which not only looks impressive (purple food always does) but tastes brilliant too. If you cheat and buy pastry (I'm not telling anyone) then it is even easier.

I have discovered some wonderful goats cheese recently, from the excellently named Wobbly Bottom Farm, they do a range of goats and cow cheeses made from goats and cows on their own farm. My favourites are the soft flavoured goats cheeses, rolled in all manner of lovely things such as piri piri seasoning, black pepper or herbs. Yummy!
For my readers in Cambridge, they sometimes appear at local markets but the cheese is also stocked at the Cambridge Farmers Market outlet on the corner of Lensfield Road/Regent Street.

Beetroot & Goats Cheese Tart
makes one 28cm round tart

First of all either make your pastry, or roll out a sheet of bought shortcrust pastry. Oil or butter your tin, mine was non stick anyway but I have pastry paranoia so I greased it anyway. And then line your tart tin with your pastry. Leave about 1.5 inches overhanging, line with tin foil and fill with dry beans or rice. Blind bake for 15 minutes at gas mark 5 / 180c.

Whilst the pastry blind bakes make your filling.
For the filling you'll need:

3 small beetroots - peeled and grated
3 medium eggs
about 50g of parmesan, finely grated
50ml of milk
1 teaspoon of creamed horseradish
small handful of chopped parsley
seasoning
About 75g of soft crumbly goats cheese

Whisk your eggs in a bowl and then mix in your milk. Then add in the rest of the ingredients except the goats cheese and stir to combine.
Remove the pastry from the oven when it is light golden brown and nearly cooked all over (keep the oven on), remove the beans/rice and the foil. Whilst it is still fairly warm trim the excess pastry from the edge of the tin. Leave to cool slightly for 5 minutes before adding your filling in, hot pastry and cold eggs don't mix too well! Scatter the crumbled goats cheese over the top of the tart, or slice into rounds and place on top.

Return to the oven for 15- 20 minutes until the mixture has a slight wobble in the centre, but is cooked everywhere else. Cool for as long as you can bear before eating it!

P.S. I am sorry for the Instagrammed photos, normal properly taken photos will return some day, probably when the light levels are better.

Pin It

Thursday, 24 November 2011

Spiced Chickpeas with Peppers


This is a dish based on a lovely chickpea salad I had for lunch, and inspired by it and the desire to make it better it became a very nice weeknight dinner. I used dry chickpeas, soaked overnight and whilst I was at work, soft fried peppers, lots of homegrown chilli, garlic and spices. I siimmered for a while and then topped with feta cheese and piled onto warm flatbreads.

I used dry chickpeas here because they do taste nicer, I find they are less floury, but you can substitute canned. I didn't make the flatbreads, but instead use the new Warburtons square wraps, they are based on the idea of tortilla wraps but are thicker and less like chewing on plastic than the normal 'mexican' style ones you find in supermarkets. I'm going to use these for square tacos soon!

Spiced Chickpeas with Peppers

100g of dry chickpeas, soaked overnight and boiled for 10-20 minutes til tender
Or 1 can of chickpeas.

2 bell peppers sliced into thin strips
1 teaspoon of honey
1 tablespoon of red wine vinegar


1 large clove of garlic
1 large green chilli (red chilli if you like it hot!)
1 heaped teaspoon of ground cumin
1 heaped teaspoon of ground coriander
1 teaspoon of smoked paprika
Squirt of tomato ketchup
Salt and pepper

Boil your chickpeas whilst you do the peppers, if you are using dried chickpeas.
Cut your peppers into thin strips and fry on a high heat for a few minutes with some seasoning. Add in a little honey and the red wine vinegar and then pop the lid on and reduce the heat. This will soften the peppers. Simmer gently for 10-15minutes.

Fry the garlic and chilli in olive oil for a minute or so, then drain your chickpeas (either after boiling or from your can) and throw them in. Add in the spices, tomato ketchup (yes it seems a bit strange but it gives the dish a sauce and tomato-ey flavour) and season. Stir in your softened peppers. Simmer for 5 minutes to let everything flavour the chickpeas and peppers, add a splash of water in it if looks a bit dry.

Pile into bowls and serve with some oven warmed flatbreads and feta cheese on top.
A sprinkle of chopped coriander wouldn't hurt either.

Pin It

Tuesday, 8 November 2011

Sort of Sea Spiced Aubergine


Whilst it might seem a cliche, since Mr. Giraffe became vegetarian we've been eating a lot more aubergine, a lot of people describe it as being meaty - although I don't really see that - but it is very substantial which means it is easy to make it the centre of a meal.
This is my 'sort of' sea spiced aubergine, it is probably not very authentic but it has all the right mix of flavours - deep savoury, chilli burn and a little sweetness. This always takes me longer to make than I think, due to the fact that aubergines take SO LONG to roast. After they are roasted the dish comes together pretty quickly though.

Sea Spiced Aubergine - serves 2

2 medium sized aubergines
olive oil
2 fresh chillies

For the sauce
2 tablespoons of dark soy sauce
2 teaspoons of  Tamari (or just add in another tablespoon of dark soy sauce)
2 teaspoons of chili bean paste (or any good chilli sauce, or sambal oelek)
3 cloves of garlic, minced
1 inch piece of ginger, grated
1 teaspoon of sesame oil
2 teaspoons of honey
juice of 1/2 a lime

Heat the oven to 180 degrees c / gas mark 4.
Line a baking dish with foil and wrap your aubergines and chillies up in the foil, drizzle with sunflower or a mild olive oil before you seal. Roast in the oven for about an hour to an hour and a half, about half way through remove the chilis and turn the aubergines. Slice the chillies in to small pieces. If you don't want too much heat you can use 1 chilli, or leave the seeds out.

For the sauce mix all the ingredients together in a bowl with the roasted chillies.

When the aubergines are ready, remove from the dish and let them cool so they aren't going to burn your hands off when you slice them. They should be very very soft and collapsed slightly.
Cut your aubergine into rough chunks, about 2 inches.
Heat up a large frying pan or a wok, add in some sunflower oil and then your aubergines. Fry for a minute and then pour in your sauce, followed by a little hot water if it is a bit dry. Simmer for 5-10 minutes on a medium to low heat.

Serve with egg fried rice or fine egg noodles.

Pin It

Tuesday, 2 August 2011

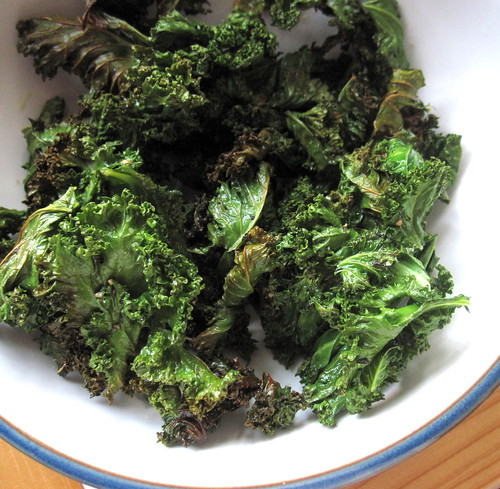
Kale Chips


Kale is one of those vegetables that I do like but always ends up getting left in the back of the fridge to go off. I received some in my veg box and after a week I really really needed to use it up. I normally put it on pizza but we weren't having pizza so I made kale chips, which I've heard about before.

Kale chips are super duper easy, it is nearly not a recipe.
Just wash your kale, remove the stalky bits and tear in to medium sized pieces. Drizzle over some olive oil and season, toss to cover all the leaves.
Bake in a low-medium oven (about 150c) for 10-15 minutes, turning every five minutes to stop them buring - mine caught a little bit which means they go a bit bitter.

Eat!

Pin It

Thursday, 26 May 2011

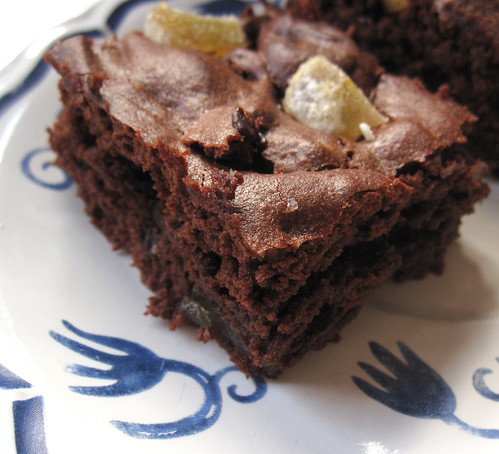
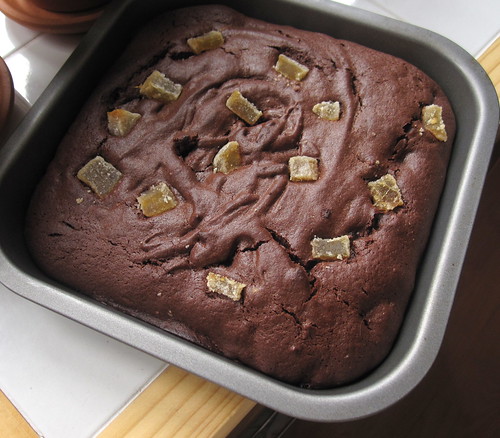
Candied Ginger Brownies

You'd think I would have enough brownie recipes on here but I don't think there is such a thing as too many brownie recipes, or too many brownies!

Lately I have been more of a fan of brownies with things in them, before I was more of a chocolate nut and just wanted them to be as chocolatey as possible - which is obviously no bad thing either. But sometimes it is fun to experiment!


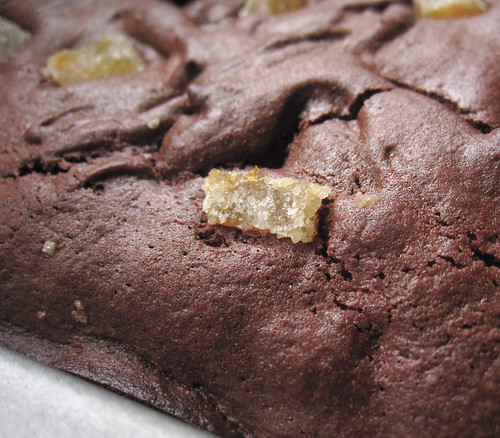
Spiced brownies are lovely and these candied ginger ones give you a good hit of ginger in each bite, and a bit of texture from the candied coating.

If you really like ginger I would make your pieces big but if you don't chop them up finer than I did, it will all work out fine either way. These are semi gooey brownies, with a nice crisp top.

100g good quality (70% cocoa or more) dark chocolate
70g butter
100g caster sugar
2 eggs
1/2 tsp of vanilla extract
75g self raising flour
1 tsp of baking powder
25g cocoa (or just use more flour)
100g candied ginger, chopped

Preheat your oven to 400f, 200c (180c fan) or gas mark 6

Break your chocolate into pieces and melt together with the butter in a bowl over a pan of simmering water, stirring frequently.
Take the bowl off the heat, leave to cool for a few minutes and then add in sugar and then your eggs one at a time.
Then add in the vanilla. Sift in the rest of the dry ingredients and fold together.
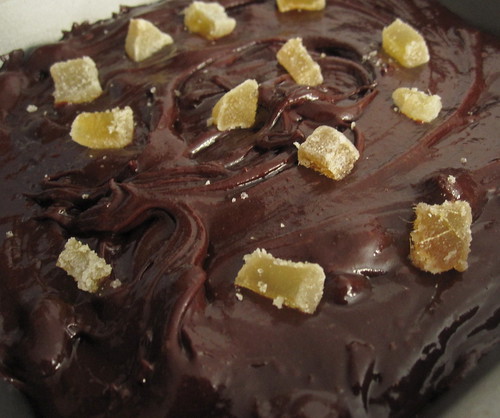
Then carefully fold in your chopped candied ginger, saving some for the top.


Pour into a non stick or greased and lined 9 inch square cake tin and sprinkle over the rest of the ginger. Bake in the oven for 15 minutes.

Pin It

Wednesday, 18 May 2011

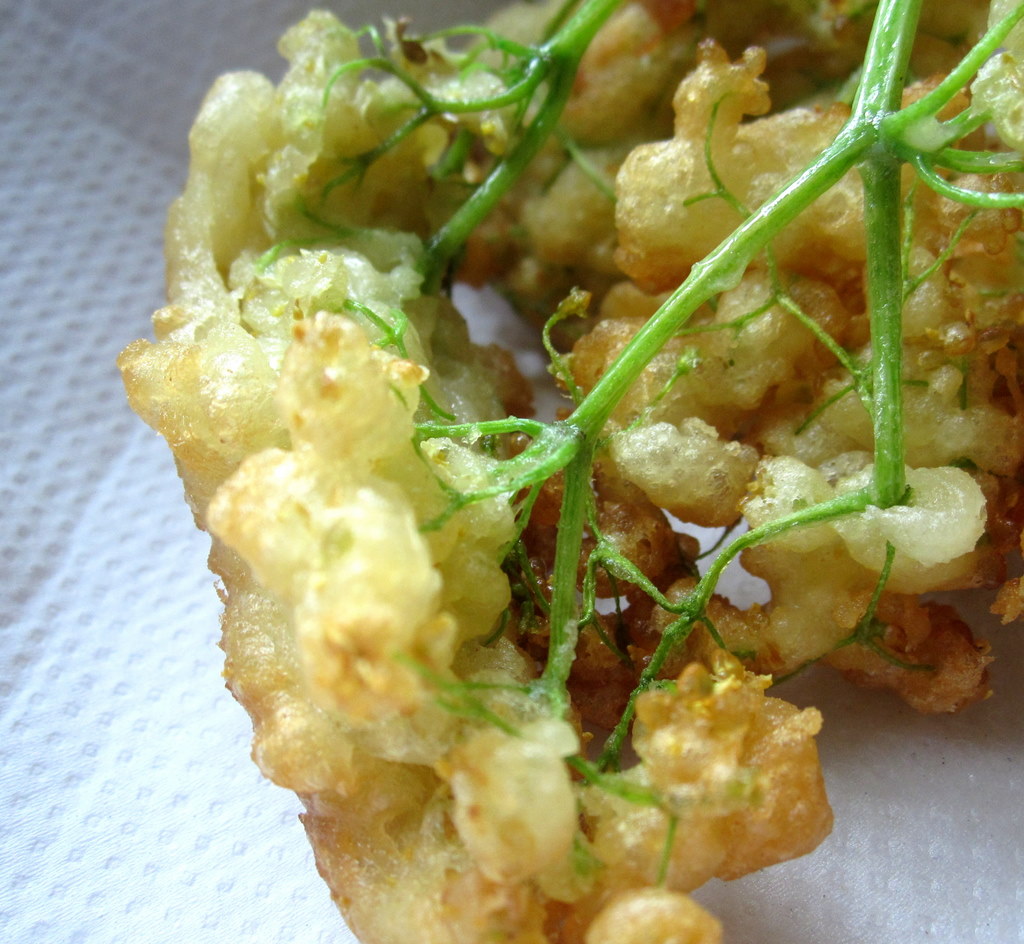
Elderflower Fritters - version 2


It's elderflower season!

Well strictly speaking it isn't but the whether has been so warm lately that elderflowers are blooming nearly more than a month early. I know this because I made fritters in late June last year. 

They were so good that I couldn't wait to get my hands on some more this year, so I am glad they are early.


Elderflowers grow almost everywhere so you shouldn't have too much trouble finding your own in the countryside.  I am lucky, I have a tree in my garden!

I am waiting for some more to bloom so I can make cordial too. So check back for a post on that.


Last time I made fritters they were nice but the batter was a little dense and my technique wasn't so great so they weren't all that pretty. I replaced some of the milk for sparkling water this time around, giving them a light batter, much like you would use for tempura.

Elderflower Fritters - serves 2 / makes 6 fritters

6 heads of elderflower - checked for bugs

50ml of milk
100ml of sparkling water
100g of self raising flour
pinch of salt
1/2 teaspoon of baking powder
1/2 teaspoon of vanilla extract
1 egg

ground nut or sunflower oil for frying

Use your elderflowers as soon as you've picked them, if left too long they start to smell strange and lose their floral scent. Check them for any bugs but do not wash them otherwise you'll lose all the lovely pollen, which is where the flavour is.

To make your batter mix together the milk, water and then the egg. Slowly whisk in your flour, salt and baking powder until you have a loose batter - the consistency of single cream. Add more water if necessary.

Heat about 2-3 inches of oil in a large saucepan. Pop a bit of batter in after about 2 minutes to check if it is hot enough.

Dip your elderflower head in and twist slowly to make sure it is fully battered, then pull out and let the excess batter drip off. Carefully put into the hot oil - if you keep the stems long when picking you will have something to hold on to. Fry in batches for a few minutes until golden brown, drain on kitchen paper.

I like to serve them drizzled with honey and with a scoop of ice cream.

Pin It

Monday, 16 May 2011

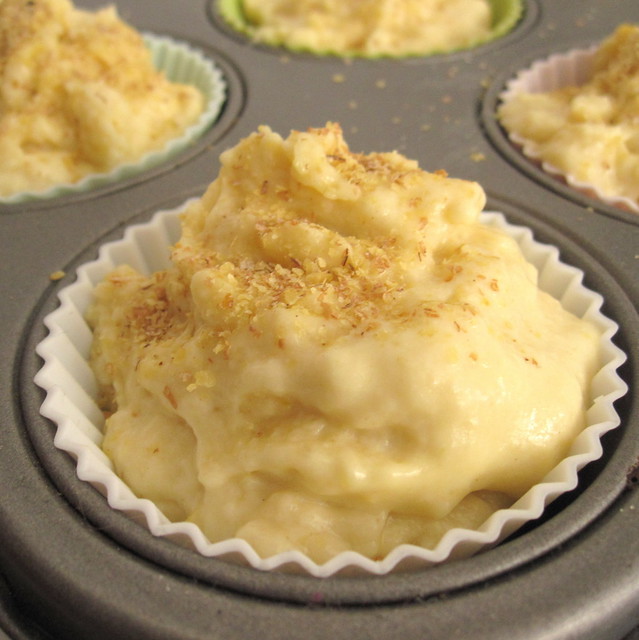
Lemon & Ricotta Breakfast Muffins


I called these muffins so you can eat them for breakfast.
I am kind to you like that.


I made these for three reasons.

1. I had a lot of lemons
2. I wanted to test out my new silicone cupcake breakfast muffin cases

3. I like to eat cake for breakfast.

On a serious note, they do have much less sugar than a cupcake, and of course no icing or buttercream -they aren't particularly sweet, so add more if you want a sweet muffin. They are lovely split open and served with some natural yoghurt and honey.


Lemon & Ricotta Muffins
makes 12 muffins

1 cup (200g) of self raising flour
1/4 (50g) cup of sugar
half teaspoon of baking powder
pinch of salt
2 tablespoons of honey
1/2 (100g) cup of ricotta
1/4 (50ml) cup of milk
3 tablespoons of melted and cooled butter (approx 75g solid)
1 egg
zest of 3 lemons, juice of 2
oats or wheatgerm to sprinkle on top - optional

Preheat your oven to gas mark 4 / 180c / 160c fan.
Mix the dry ingredients together in a bowl. Do the same with the wet ingredients and the egg, whisk them together. Slowly fold the wet into the dry, taking care not to over mix.

do you like my silicone cupcake liners? fancy and useful.

Fill the cupcake cases generously with the mixture, about 1 cm from the top - you want them to rise high.
Sprinkle with some oats or wheatgerm if you'd like.

Bake for 15 - 20 minutes until they are cooked through.

Pin It

Thursday, 5 May 2011

Lemon Bars for UK Handmade Summer Issue

Hello!

I have been a bit quiet on the blog front recently, I have just started a new job and still getting into the swing of things. Also I had a rotten stomach bug last week which left me with nearly a whole week off unable to bake anything!


I did however recently write a recipe for the UK Handmade summer issue, some gloriously summery lemon bars. It is on page 47, please have a read and the rest of the magazine is just beautiful this month.

I will be back very soon with some new recipes :)


Deepa

Pin It

Thursday, 3 March 2011

Sourdough Bread


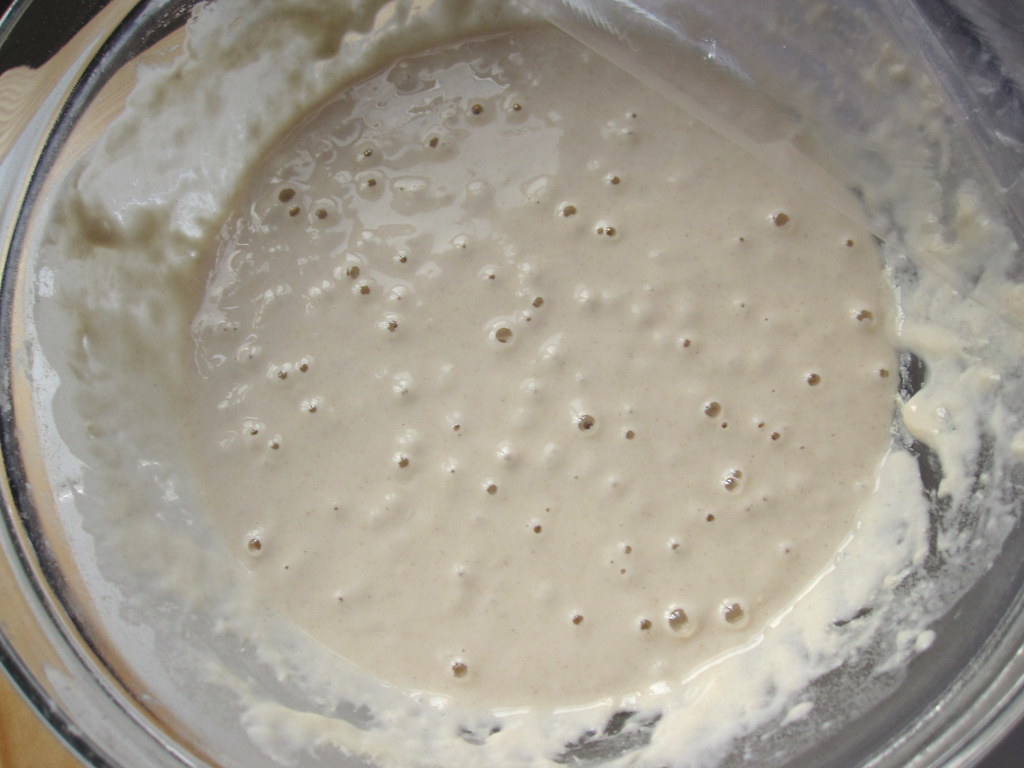
I started my sourdough starter nearly two weeks ago, and the week between making the starter and making the bread made me really impatient!

I love sourdough bread, it keeps really well and has a really distinctive taste.

I used the recipe from River Cottage to make my bread, using 100ml of my starter (which I fed again once I had taken some out for bread). You have to make a 'sponge' first and leave it to ferment overnight. This bit is a bit nerve wracking first time because it is then if you find out if your starter will ferment - luckily the morning after I was greeted with a nice bubbly bowl of sponge.


Once worked into a dough and proved all day it baked to a lovely big loaf. I think the only mistake I made was getting a bit carried away with making sure I had a nice crisp crust. I poured water into the tray a few times during cooking so the crust was really thick, not so great the day after, but good straight out the oven.
Next time I will fill up one tray of water and leave it at that.

I am looking forward to making some more bread next week. I have also seen a recipe for sourdough pancakes which sounds interesting!


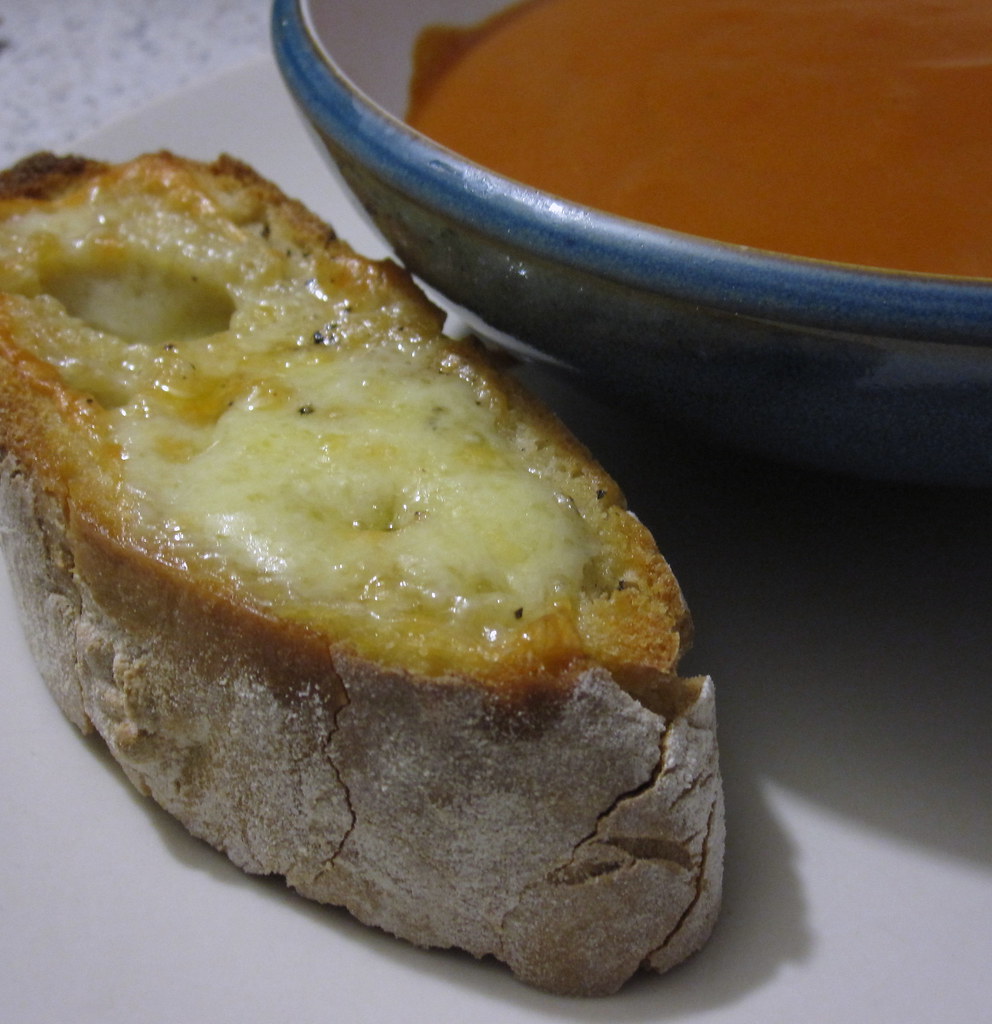
I made a simple tomato soup to go with our sourdough which I topped with cheese and grilled. Yum!

Pin It

Sunday, 27 February 2011

Rhubarb Custard Cake with Lemon Glaze

Forced rhubarb time is here! It definitely feels like spring time when seasonal fruit comes back into the shops. I love the colour of forced rhubarb too, shocking pink just reminds me of summer time rather than dull old February.


I bake with rhubarb a lot, cakes, cupcakes, pies, simple crumbles and jam. This recipe is super simple to make, the crumb is creamy - to me it actually tastes of custard  - and we all know what rhubarb goes with! This batter has more eggs and less flour, hence the custard taste, and the juices from the rhubarb seep out whilst it makes which makes it extra moist.


I experimented with a lemon glaze too, rhubarb is sour but I think the glaze works surprisingly well.

Rhubarb Custard Cake
makes one cake, I baked mine in a 7 inch square tin.

150gs of softened unsalted butter
150gs of white sugar plus extra for the top
2 eggs
1 tsp vanilla extract
100gs self raising flour
1/2 tsp of baking powder
zest of one lemon
2 large sticks of rhubarb

Cream the butter and sugar together until pale and fluffy, mix in your eggs one by one and then the vanilla. Fold in your zest, flour and baking powder til just combined. Pour the batter into a greased and lined cake tin (mine was non stick so I didn't use any baking paper)
Trim your rhubarb and chop into 1 inch pieces, arrange over the top of the cake, sprinkle about a tablespoon of sugar over the top, this will add a bit of extra sweetness to the rhubarb.

Bake in the oven for 25 minutes at 200c / gas mark 6 til cooked through. When a knife is inserted it won't come out absolutely clean because it is quite a moist cake, a few crumbs should stick.

Leave to cool for about 5 minutes and then very carefully transfer to a plate or a board to allow you to glaze the cake.

For the lemon glaze
juice of one lemon
dash of vanilla extract
approx 70g caster sugar

whisk both together until well combined, the sugar doesnt have to dissolve as you want a nice crunchy top. Spoon over the warm cake and leave for as long as you can before grabbing yourself a slice.

This cake is just lovely out of the oven as it is incredibly crispy on top, you can reheat it slightly from cold to crisp up again too.

Pin It

Wednesday, 23 February 2011

Starting a Sourdough Starter

I have started a sourdough starter! I started it on Sunday, so far it is going well and I had bubbles last night. I am probably too excited about it. Hopefully I can make some sourdough over the weekend.


This blog post from Joy the Baker is super useful, some of the other recipes out there are ESSAYS on the subject, really it is simple. One cup of bread flour. One cup of water. Blend. Every 24 hours for the first 3-4 days you need to feed it. Do this by throwing half away, and adding half cup of water and half a cup of flour. Stir. Leave in a warm place. Once it has established itself you keep it in the fridge and feed it once a week.


(if anyone knows how to take an attractive picture of this big yeasty floury mess I'd be grateful, haha).

Pin It

Monday, 24 January 2011

My First Macarons & Using Up Your Egg Yolks Lemon Curd

Hurray some food blogging!

I've been a bit remiss since Christmas (ok way before then) even though I've been baking lots of things and making lots of things.

Macarons have been on my lists for ages and ages, our last house had the worse oven on the planet, it couldn't even cook a baked potato evenly so I wasn't trusting it with macarons. Since we have moved we have a nice shiny electric oven which keeps the temperature even and cooks things nice and quickly. I can now bake a whole cake in less than an hour and without checking it every 2 minutes impatiently.

This also means I can now make meringues, lemon meringue pie specifically! Yum.

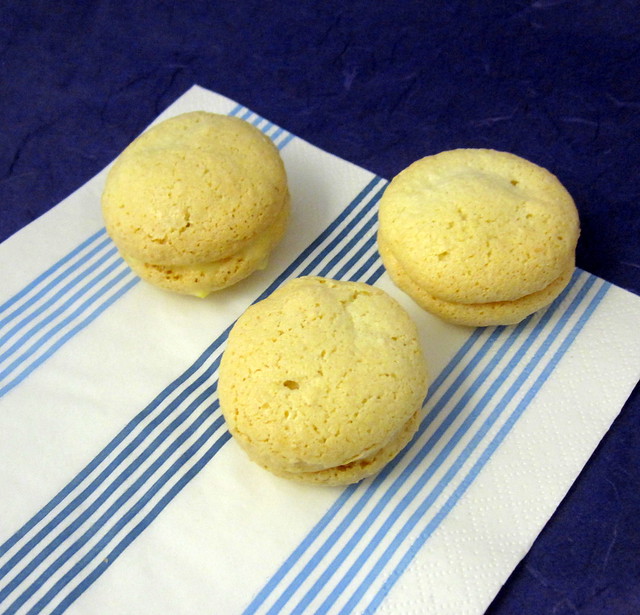
I used the recipe over on The Catty Life, she embued me with confidence that I Can Do It. Macrons scared me a bit, maybe I read too much into them and worried about how hard they would be.

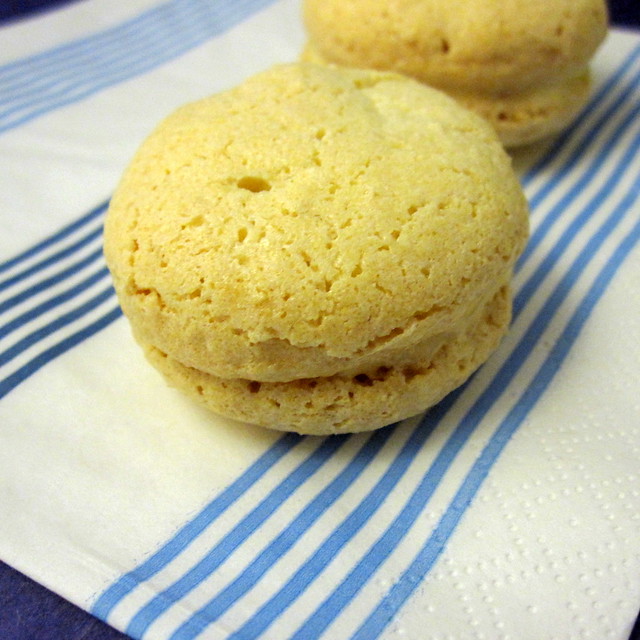
I didn't age my egg whites, like you should, because I forgot. I still got the taste of macarons and the airy inside, but I didn't get the longer for 'feet' and a thicker shell. You can make macarons with un-aged egg whites but they won't be as pretty!


Vanilla Macarons with Lemon Curd Filling 
recipe from the catty life 

100g ground almonds
200g caster or icing sugar (I used caster which was fine)
50g caster sugar
3 egg whites - preferably aged by leaving them in a bowl at room temperature for 24 hours.
squirt of vanilla extract

Whip your egg whites still they start to foam/turn white, then add in the 50g of caster sugar slowly to combine. Whisk further til you the eggs form stiff peaks, add in the vanilla extract.
Combine the almonds and the 200g of sugar in a bowl, mix, then carefully fold them in to the meringue mix, adding it in quarters til combined.
Using a piping bag dot the mixture on to a lined baking tray, mine were about 1.5 inches wide, they don't spread too much in the oven.
Leave for 30 minutes to an hour til the mixture sets a little, it should form a 'shell' on the top.
Bake at 150 degrees celsius for 15 minutes. Keep checking, the recipe says 10 minutes but I needed a bit longer.

Remove when cool by sliding a knife under each macaron.
Sandwich with lemon curd, eat four in a row like I did.


Lemon Curd
This lemon curd is great because you can use up your leftover egg yolks from the macarons.

3 egg yolks
100g caster sugar
juice and zest of one lemon
50 grams of unsalted butter, cubed

Beat the egg yolks and caster sugar in a heatproof bowl using an electric whisk til the sugar has dissolved.
Then place the bowl over a saucepan of boiling water, add in the lemon juice and zest plus the butter. Whisk to melt the butter, the eggs should start to thicken, keep whisking. Keep an eye on the heat as you don't want the eggs to scramble. The mixture is done when it coats the back of a wooden spoon - it will thicken further as it cools.
Immediately pour into hot sterilised jars (this actually makes one jar) and seal. Keeps for 2 weeks in the fridge, after opening.

Pin It