Friday, 26 February 2010

bacon, cheese, chipotle, macaroni

Yep - bacon, cheese and chipotle chilies with macaroni.

I picked up a tin of chipotle chilis in adobo sauce at the Cambridge Cheese Shop at the weekend. These are hard to find in shops in the uk, you can buy them online only (try mexgrocer.co.uk). A lot of mexican recipes call for a chipotle chili to be added to the mix, things like a good chili, gumbo, enchilada sauce. I LOVE mexican food and so I am so pleased to be able to find these locally.


Obviously now I was in possession of this key ingredient my mind went blank on what to use them for. Then this recipe on the Homesick Texan blog magically appeared on my reader one rainy day!
I love mac and cheese, growing up in a household where we had gujarati food every day and anything that wasn't spicy was given a small amount of it anyway, mac and cheese was something I had never had until I started cooking myself.


This recipe really works to give an extra kick to the mac and cheese (reminscent of my mum's turmeric laced lasagne, but in a good way!). Although it does use a really really large amount of cheese - a 2:1 ratio of cheese to pasta - it produces a lighter sauce than your traditional flour, milk and cheese sauce.

A few notes about my recipe - I forgot the cottage cheese. I knew it would give a thicker texture and I didn't have anything like mascarpone or thick cream to replace it with, so I just used less milk and replaced the cottage cheese with more cheddar. And one of the things the original NY Times recipe says is - if in doubt - use more cheese. If your sauce seems thin, add more cheese!

Also try and find a really mature cheddar, this will really make a difference to your sauce.
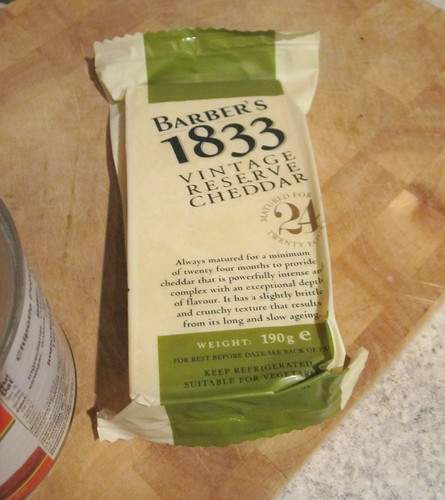
If you can't get hold of chipotles in adobo you can add a dash of chili powder or maybe even some tabasco sauce to your sauce. You won't get the same smokey depth of flavour like chipotles give but you'll get that extra kick!

Chipotle & Bacon Macaroni Cheese
serves 2 greedy people
adapted from Homesick Texan and NY Times

400g (2 cups) dried macaroni pasta
3/4 pint (1 1/2 cups) of semi skimmed or whole milk
now get ready... 800g (4 cups) grated extra mature cheddar cheese
1 chipotle chili plus a couple of teaspoons of adobo sauce from the tin
1/2 teaspoon cumin
2 rashers of back bacon or 4 of streaky or pancetta, cut into chunks.

Preheat your oven to 375f / 190c / gas mark 5.
Pop the dish you are using in the oven to heat up, try to use a very deep ceramic dish if you can.

Blend together your milk, cheese, the chipotle chili and sauce and cumin. Do this in a food processor or a stick blender in a bowl. Season with black pepper.

Remove your dish from the oven and add your pasta (no need to cook it before, promise!) and then stir in the blended sauce. Cover with foil and bake for 30 minutes.
Then remove the foil, add the bacon on top and bake for a further 20-30 minutes until the pasta is cooked. You can add cheese to the top here if you like, but if you don't the pasta will still bake up with a nice crust.

I don't normally do drink/wine recommendation (mainly because I don't know much about wine!) but I had this with a glass of apple and rhubarb juice which was a nice bit of sharpness to go with the cheese.

Pin It

Thursday, 25 February 2010

work in progress

Normally with jewellery projects come together quickly and there aren't many versions of something, mainly because its easy to tweak things as you are making the final version.

Lately I've been working on some more complex projects and some experimental wire wrapping.

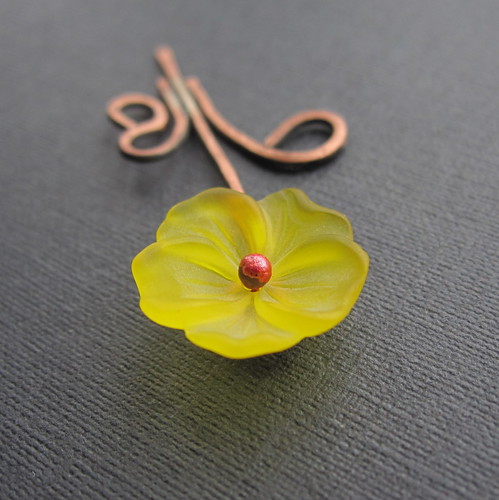
I've got these two lovely work in progress pieces which I hope to finish very soon, I am especially excited about the handformed daffodil that I hope to bring to my shop for Easter.

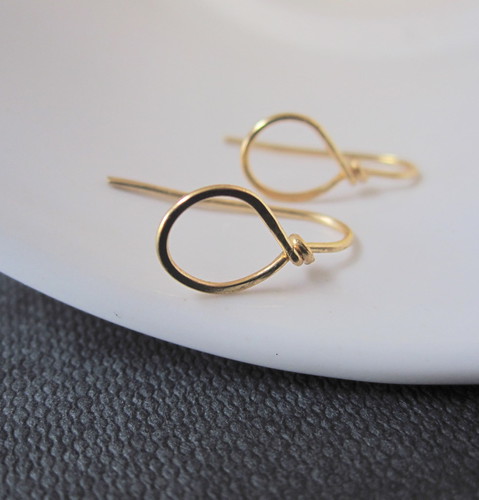
These little brass teardrops will be in my shop very soon, I made them as teeny as can be so I think they need to be a little bigger.

I am also planning versions in silver and gold fill (and in fact i've had another idea for them whilst I've been writing this - Yay!)

Pin It

Wednesday, 24 February 2010

Polishing

I do like an 'in progress' pic - I like capturing the ordinary.


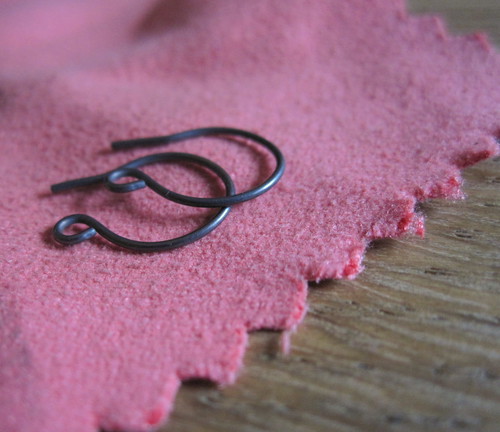
I loved the way the pink polishing cloth looked against these oxidized earwires that I just made.
It has also given me an idea for a pair of earrings, now I need to track down some beads that go perfectly.

Pin It

Tuesday, 23 February 2010

Cooking - Healthy Baking - Granola Bars

This recipe has been sitting in my favourites folder for quite a few months, it looked fantastic but always got passed up in favour of pecan pie, sticky toffee pudding or some fluffy marshmallows. Because really, when it comes to it, these things generally win over an oaty bar.

In an effort to be healthier and because I've been chewing on ridiculously overpriced cereal bars recently I thought I'd finally give my own granola bars a go.

This recipe is from Smitten Kitchen, once again, as many of my recipes are.

I used half and half honey and golden syrup (whereas the recipe only used honey) because I only had a teeny jar of honey. The fruit I used was a bag of mixed fruit - raisins, currants and candied orange, and some jewel like dried cranberries.


The recipe suggested extra sugar if you want a sweet bar or melted butter. I didn't include either but I think I'll include a bit more honey next time and I think the butter would help them stick a bit better. Mine were a bit crumbly!

These are lovely crunchy bars and the fruit gives just enough sweetness. I had a bit of a disaster when cutting them up so I was left with actual granola/muesli which I had for breakfast the next day - it makes great cereal too!

Pin It

Sunday, 21 February 2010

Sunday Dinner


Not a recipe as such but we had a lovely sunday dinner today and I just had to post a picture (and most welcome it was too as we've been trying to cut back on eating meat recently).

Roast pork, crackling, roast potatoes, yorkshire pudding and creamed spinach.

If you try one thing here it must be the creamed spinach recipe from Smitten Kitchen. We filled our pancakes with it on pancake day too, its very versatile and yummy.

Pin It

Saturday, 20 February 2010

Treat Yourself - Free Shipping


Hello there!

I'm running a special offer in my Etsy shop this weekend- FREE SHIPPING!

This is on all jewellery to all countries!

And if you mention BLOG during checkout I'll give you another 10% off.

You can wait for a revised invoice with the discount applied or I'll refund your discount after payment.

Happy Weekend everyone!

Pin It

Thursday, 18 February 2010

Uniquely vintage...


I came across this beautiful vintage optical lens recently, I love the vintage character it has! I think it is especially good because they were never meant for jewellery but they work so well on a long necklace.

It is an opticians lens with a strength of 8.00 - you could even use it as a magnifying glass -maybe something for a gardening or nature lover? The glass is nice and thick and in wonderful condition, I can't see a scratch on it.


I've put mine on a long brass chain with a lovely spring time flower on top!

In my Etsy shop!

I'll have another lens necklace coming soon too!

Pin It

Wednesday, 17 February 2010

Cooking - No Knead Bread


I love baking bread but my loaves never tend to be as light and fluffy because of my extremely poor kneading technique. I just don't have the muscles! I must have come across this recipe for No Knead Bread about a year ago, I have no idea why it took me such a long time to make it. It came up on a few more blogs recently and so I set aside some time this weekend to make it.

This bread is not about instant gratification, due to the first prove being 20 hours long, but it is about very very little effort.

Because of the long proving process the dough is beautifully light and airy with very little effort. Also it has a higher water content than conventional bread recipes so you get a beautiful crisp crust.

No Knead Bread
makes approx 1 1lb loaf

This recipe comes from the New York times so my measurements are in cups, apologies to those in the UK! I believe you can buy cups in John Lewis, Lakeland and some supermarkets now. I got mine on ebay for about £5.

Ingredients:
3 cups strong white bread flour
1/4 tsp instant yeast (this will use very little of a 7g packet)
1 tsp salt
1 1/2 cups of lukewarm water


Put your flour in a large bowl, add in the yeast and the salt.
Then add in your water and stir until you have a soft sloppy dough, like a very thick cake batter. Add a touch more water if your mix seems a little dry.

Then all you need to do is cover the bowl with cling film and leave in a warm non draughty place for a minimum of 12 but up to 20 hours, I left mine for 20 hours.

After your first prove the dough will be bubbly and light like this:
Drop your dough onto a very well floured surface and form into a rough round shape with wet hands. Your hands won't stick to the dough if they are wet.
Drop this dough into a bowl lined with a floured cotton towel. Cover with the towel and leave to prove for 1-2 hours, I left mine for 1 1/2 and it was fine. It should double in size.

Half an hour before your dough is ready heat up your pot. Set your oven to gas mark 8 / 450f / 230c. You need to use a thick strong pot, such as a casserole dish, with a lid. I used a big stoneware dish. If I had a Le Creuset it would be perfect for this!

When your dough is ready add it to your pot. The recipe I used said to line with greaseproof paper if your pot isn't non stick, unfortunately I did this (and floured the paper) and the dough stuck! So I would recommend oiling your paper or just flouring your pot very well.

Bake your loaf for 30 minutes covered, then for another 20 minutes uncovered to crisp the crust. It should sound hollow when tapped on the bottom.

Leave to cool for 5-10minutes afterwards, then slice into big chunks and serve with proper butter!


Pin It

Tuesday, 16 February 2010

Handcrafted for Foodies - Egg & Soldiers

As part of a new series on my blog I will be spotting handcrafted foodie delights and sharing them with you all.

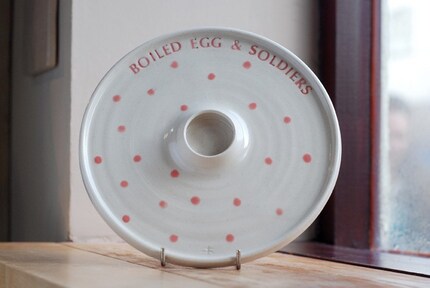
I came across this seller Jennifer Hamilton in Bristol who sells her handmade pottery, I am particularly taken with her uniquely shaped egg cups and even better the boiled egg and soldiers plate!


Egg Cup and Boiled Egg & Soldiers Plate by The Village Pottery

You can even pop in and visit Jennifer in her shop, located in Clifton Village near Bristol.
The Village Pottery


Pin It

Monday, 15 February 2010

Monday Moodboard - Colour

I need a splash of colour to brighten my day today!L-R
Candy Lotus Ring - SNoU
Colours Necklace by Vadjutka
Sardana Screenprint by Roddy & Ginger
Daisy Fortune Ring by Meltemsem

Pin It

Sunday, 14 February 2010

Cooking - Double Chocolate Cupcakes


Things have really been busy on the food front lately, as you can see from the blog.
With it being Valentines day today and with me not needing any more excuses to make cupcakes, I made these for my husband (oh ok, and also for me...).

These are for the chocolate lover in your life, light and moist chocolate cupcakes topped with a beautiful and rich buttercream with extra dark 70% chocolate. I added a touch of golden syrup to my usual sponge recipe and it gave the cupcakes a lovely crisp top, a bit like a brownie.


For 12 cupcakes:

4oz / 100g butter
4oz / 100g caster or granulated sugar
2 eggs
2 oz / 50g self raising flour
2 oz / 50g cocoa powder (Green & Blacks is the best)
2 tsps golden syrup
1/2 tsp vanilla extract
optional - dried cranberries

Cream the butter and sugar til creamy, add in the eggs, vanilla extract and golden syrup. Combine. Then fold in your self raising flour and cocoa.

Spoon a generous heaped tablespoon into cupcake cases. Sprinkle with a couple of dried cranberries. Bake at gas mark 5 for 15minutes. Once baked allow to cool whilst you make the buttercream.

for the buttercream - thank you to Big Stove Year for the recipe, I reduced it for my cupcakes and it came out lovely!

100g butter, softened
100g icing sugar
tablespoon of milk
50g melted chocolate - 70% at least

*if you are really into your dark chocolate you could substitute a couple of tablespoons out of the icing sugar for cocoa powder for a proper chocolate kick.

Melt chocolate over a bain marie or bowl over hot water in a pan.
Cream butter and icing sugar together with the milk, use an electric whisk, this will really save your arms! Add a touch more milk if your icing seems a little dry.
Once combined add in your chocolate and whisk til very smooth.

Spread or pipe (I tried piping and it wasn't neat!) your icing over your cupcakes. Leave to set in the fridge until you can't bear it any longer and must eat one.

And obviously save one or two for the loved one in your life...

xx

Pin It

Saturday, 13 February 2010

Cooking - Cacio e Pepe


Sometimes the simplest ideas are the best.
Cacio e pepe (spaghetti with cheese and black pepper) is a classic and has been doing the rounds in the food blogging world for a long time. I've always meant to try it, I was in a lunch rut today and so I gave it a go.


I used a recipe from Smitten Kitchen with linguine and parmesan instead of spaghetti and pecorino.


Serves 1 - easily doubled

1/4 lb linguine
approx 2 oz parmesan
teaspoon fresh ground black pepper
olive oil
knob of butter

Cook your pasta al dente, drain but reserve about 1/4 mug full of cooking water.
Heat olive oil in a pan til nearly smoking, then add your pasta and water (stand back as the water will splatter!). Cook for 30 seconds then add all but a tiny bit of parmesan and all your pepper, then your butter.
Stir to melt butter until a sauce forms.
Serve sprinkled with reserved parmesan.


It was perfectly simple, and not as dry as I expected. And so completely easy to make. I would say you could add things like herbs or chili but I think the best thing about this is the simplicity. Any more and it becomes something else entirely.

I'd definitely like to try this with fresh pasta next time too, i might even make it myself!

x

Pin It

Thursday, 11 February 2010

Thinking of Spring..

We've had a dusting of snow recently, with more forecast next week, but I just can't help thinking of Spring right now!


I have redesigned some old favourites, these Kiwi Earrings, now in beautiful golden brass (they were previously in copper), and the earwires are handmade by me.

I think these beads look like Jolly Ranchers, don't you? :)

In my Etsy shop!

Pin It

Wednesday, 10 February 2010

Posting dates for Valentines Day

I have lots of Valentines themed gifts in my shop, hearts and flowers, reds and pinks.

Please order by Thursday 11th February to receive your gifts in time for Valentines - if you are in the UK.

Happy Shopping!

Pin It

Tuesday, 9 February 2010

macadamia, hazelnut and choc chip cookies

These cookies are a result of having lots of tiny packets of nuts from the Graze box we receive. I have to admit we eat the interesting things first (korean chili crackers, wasabi peanuts, chili almonds..) and the plain things like macadamia nuts and hazelnuts generally remain unopened.

So I make them into cookies!


I based this recipe on this one over at Joy the Baker- but replacing the white chocolate with 70% dark and using a mixture of nuts. The best part of this recipe is the browned butter, it gives the cookies a wonderful nutty flavour, which obviously goes with the nuts!

Macadamia, Hazelnut and Chocolate Chip Cookies.

Makes about 12 very big cookies or 24 smaller ones
(I used cups for this recipe so I'm afraid I have no grams conversion!)

1/2 cup unsalted butter - softened
1 cup caster sugar
2 tablespoons of milk (I added a touch more to the end as my dough was a bit dry)
1 egg
1 tsp vanilla extract
1 and 3/4 cup plain flour
1/2 tsp baking powder
pinch of salt

50gs macadamia nuts
50gs hazlenuts
50gs dark chocolate

Preheat your oven to 190c / gas mark 6

Heat your butter on a medium heat in a saucepan, stirring regularly. After about 5 minutes you should see brown bits appearing in the butter, once this happens remove the butter from the heat, leave to cool for a 5 minutes more.

Once your butter is cooled add it to your sugar in a large bowl, slowly mixing it in. Then add in your egg and combine. Add milk and vanilla.
Then slowly add in your dry ingredients (except nuts and chocolate).

Bash up your macadamias and hazelnuts in a freezer bag so that they are coarsely chopped.
Chop your chocolate in to medium chunks - however small you like them.
Add your nuts and chocolate to the mixture.

For large cookies spoon tablespoon ( I made big ones) fulls on to a greased and lined baking sheet, for smaller ones aim for a generous heaped teaspoon.

Bake for approx 10 minutes until golden. Leave to cool for a few minutes before transferring to a wire rack.

Eat with a lovely frothy coffee or a glass of milk!

Pin It

Thursday, 4 February 2010

Avocado & Feta Cous Cous with Creme Fraiche Dressing

I'm not much of a lunch person. I never have the time to plan it properly and when the only thing you have access to at work is a sandwich toaster and a microwave.

I like lunch when there is time to plan, or when lunch is really just an early dinner.

I made this cous cous last week, and it was something that came together so easily, lots of little treats in the fridge all waiting to be eaten, and all going together so well.


This feels like it is healthy (you know because its green and it cous cous) but I think the health benefits are questionable. But its light, delicious and just about one of your 5 a day (not that I'm ever counting).

Avocado & Feta Cous Cous with a Creme Fraiche dressing
feeds one, easily doubled

Ingredients:
50g cous cous
boiling water
olive oil
1/2 avocado sliced
feta cheese

for the dressing:
2 tbs creme fraiche
half a lime
chili flakes or tabasco sauce
black pepper

First of all make up your cous cous. Use enough boiling water to just cover the cous cous in a bowl, add in a drop of olive oil, stir and cover with a plate whilst you prepare the other ingredients.

Mix all the dressing ingredients together so you have a dressing about the consistency of double cream. Add lime and chili to your taste.

Once the cous cous is done, season with salt and pepper, fluffy with a fork.
Crumble in your feta, stir in your avocado gently and then top with the dressing and a little black pepper.

I had this warm and I thought it was just lovely, if you were to serve it cold I would suggest waiting for the cous cous to completely cool before adding in the rest of the ingredients. Add extra lime to keep your avocado green!

Serve with a wedge of lime.
I think this would be a great side dish with some grilled fish or chicken too.

Pin It

Wednesday, 3 February 2010

more metalsmithing

I've been soldering at my workbench a lot very recently and I am so pleased to be fine tuning my technique so I can list more and more things.


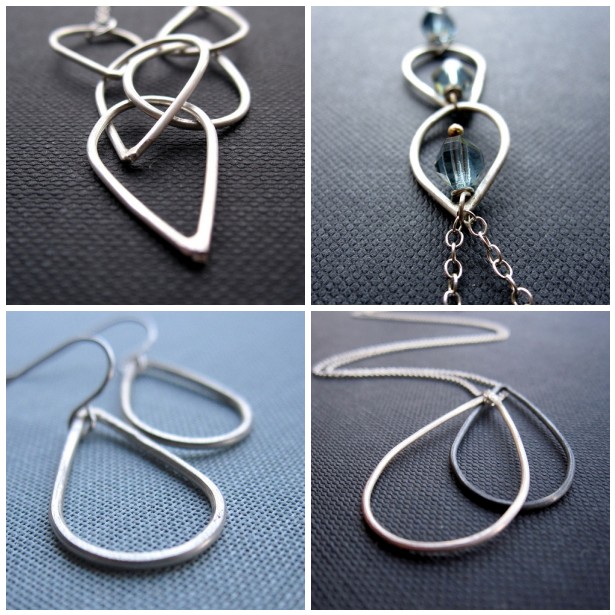
I really like the contrast that I've made between my often bright and intricate vintage jewellery and the simple, organic shapes of my silver work. I think it makes each part of my shop really stand out.

I love creating the teardrops in particular, they are so pretty and very satisfying to put together.

I have been working with circles and drops so far but I think I'd like to make more geometric shapes too - squares, diamonds. Watch this space!


x

Pin It

Tuesday, 2 February 2010

Clearing out...

I'm clearing out my very large surplus of beads! Its time to freshen up my bead boxes and I want some of these beads to have love in another home..


My destash shop has reopened again, lots of vintage beads and findings to be had :)


I hope you find something you love.

Pin It