Showing posts with label recipes. Show all posts

Monday, 29 April 2013

Gujarati Kadhi - Yoghurt 'Sauce'


It is very hard to describe what kadhi exactly it, it is basically a yoghurt and gram flour based sauce/soup/gravy for rice. You can also add it to dry curry dishes, like potato. I blogged Kitchri a little while ago, a soothing lentil rice dish gently spiced with turmeric and garlic - kadhi is the best companion for kitchri. You can also have kadhi with plain boiled basmati rice.

Kitri and Kadhi is wonderful when you are sick, it is simple, soothing and comforting - I think it has medicinal qualities similar to chicken soup! I got it together to make this on a weekend when we were both ill with a horrible cold virus thing that caught as at the end of a long winter, it is very easy to make and gentle on a tummy that has been punished by too many Hall's Soothers and Paracetmol pills.

Gujarati Kadhi
makes 4 portions, keeps well in the fridge for a few days

250ml natural yoghurt
2 tablespoons of gram flour / chickpea flour
about 1cm of grated fresh ginger
1 tbsp sugar
750ml cold water
salt
coriander

for tempering:
1-2 dried red chillies - depending on how hot you want it
pinch of asafoetida
1/2 teaspoon cumin seeds
1/2 teaspoon black mustard seeds
vegetable or sunflower oil


1. Whisk together the yoghurt, chickpeas, ginger, water in a bowl.
2. Heat the oil and add all the tempering ingredients once the oil is hot.  When the mustard seeds begin to pop add in the yoghurt mixture and then water and salt.
3. Bring to the boil, be careful it doesn't bubble over the top. Then let simmer gently for about 5 minutes, whisking occasionally to stop any lumps.
4. Taste and season again if you need to, and then add the fresh coriander.


Serve with kitchri or plain basmati rice.
The traditional way to serve it is in a small cup and let each person add the kadhi to their rice as they eat. I sometimes like to drown my rice in it, but at other times add a little to make it drier, it all depends!


Pin It

Sunday, 14 August 2011

Ridiculously Good Oreo Fudge Brownies

Bet you are already thinking about when you can next bake.

I am very late to this party, I saw the brownies on Lorraine Pascale's show a few months ago (ok it was January, doesn't seem that long ago!) and ooohed over them and then never got round to making them, which is my usual trick. Ireena made them and so did Katie and I ooohed again.
I kept on buying oreo cookies and they'd get opened and suddenly there were no more oreos. So I bought a pack and hid them at the back of the cupboard for a few weeks, and finally today I made oreo brownies.

I make a lot of brownies but I think these might be the best. Rich, sweet and almost moussey in the middle (from whisking eggs, something I've never done for brownies) and very crispy on top - and then you get an oreo in there too - magic!


You should definitely try these, I think they'd be great in place of birthday cake or even for a dinner party. Or for, you know, eating two in a row. The brownie base itself without the cookies is a great one.

I made three alterations - I didn't include the 2 extra egg yolks - mainly because I didn't have enough eggs but really I felt it was a bit unnecessary. The chocolate was just broken into small pieces, I think grating chocolate would get melty and messy! And I had some fudge chunks lying around so I put those on top before baking, they melted into the batter and then when cooled became crispy and sticky, yum!

Recipe on BBC Food.

Pin It

Tuesday, 14 June 2011

Gooseberry Crumble Cake


I think gooseberries can be a bit daunting. They are all hairy and a bit weird looking when raw, not to mention sour. But add a bit of sugar, cook them for a while and they are gorgeous. I tend to treat them like rhubarb, and my favourite thing to make with rhubarb is a crumble cake.


Crumble cakes (or coffee cakes as they are known in the USA, though they have no coffee) are impressive looking and tasting but really easy to make as they just combine two very basic recipes. They work particularly well with rhubarb and gooseberries as the double blanket of sugariness, batter and crumble, will make sure your fruit isn’t too tart.

I have previously made a rhubarb crumble cake (with a really bad photograph) but it was huge so I have dialled back the quantities a bit to make a slightly smaller cake. This is still a generous cake so will serve 6 people easily!

I made this cake with lots of vanilla and swapped half the flour for ground almonds to add more taste to the cake part. The crumble top was the basic equal parts of sugar, flour and butter mixture, and I sprinkled some more ground almonds on before baking which made the top extra crunchy.

The gooseberries are prepared very simply, I just topped and tailed them and sprinkled them with sugar.


Gooseberry Crumble Cake

Makes one 9 inch round cake

For the cake:
100g of softened salted butter
100g sugar
2 eggs
50g of ground almonds
50g of flour
1 teaspoon of vanilla paste or equal of vanilla extract
Splash of milk.
125g fresh gooseberries

Cream your sugar and butter together until nice and fluffy, then add the eggs in one by one and mix together after adding each. Then put your vanilla in and then fold in the almonds and flour. Mix to combine and then add a small splash of milk to loosen the mixture.
Pour into a greased and linked cake in.

Preheat your oven whilst you prepare the crumble and fruit. 170c /  gas mark 4

Top and tail your gooseberries. Cut the bigger ones in half but leave the smaller ones whole. Arrange on top of the cake batter and sprinkle with tablespoon of sugar.

For the crumble top:
50g butter
50g sugar
50g flour
Sprinkle of ground almonds

Rub together your butter and flour til it resembles breadcrumbs, and then add in your sugar. Sprinkle over the gooseberries, make sure they are fairly well covered but it doesn’t matter if they are peeking out a bit. Sprinkle over the almonds.

Bake in the oven for about 30 – 40 minutes until golden brown on top. It can be hard to tell if is done as the knife won’t come out clean, as long as it is cooked at a low temperature on a middle shelf it won’t burn.

Leave to cool, the cake will sink slightly. If you take it out the tin whilst it is warm it will collapse.

Slice and serve with custard, it is good with custard!


My gooseberries were from Walden Local Food, if you are nearby you must go and visit their market stall on a Saturday. I also came away with some fabulous plum tomatoes and some tender new season kale.

Pin It

Thursday, 31 March 2011

Macarons - v2


I made macarons a little while ago and they weren't quite perfect, they tasted amazing but they didn't have the little 'feet' - mainly because I didn't age the egg whites, and they weren't quite as uniform as I'd like.

These aren't quite as perfect again, I think macaron making definitely takes practice. I did age the whites and I got a nice crisp shell and 'feet' on my macarons. But I think I needed to pipe them a little smaller, as they were a bit ungainly, macarons are meant to be a delicate and sophisticated French sweet after all.

The macaron shells were flavoured with my new favourite thing - vanilla bean paste, and made pretty with a few drops of red food colouring, for a pinky colour. I sandwiched with lemon curd again, but I am going to try buttercream or maybe a chocolate ganache next time.


Despite their appearance they do taste fantastic, which some would say is the main thing.

I used Ruth's recipe from her blog - The Pink Whisk.

Macaron makers - do you have any tips for me?

Pin It

Sunday, 20 March 2011

A Lovely Loaf of Bread


I have baked a lot of bread before, no knead bread, one hour bread, soda bread, potato bread and various other things which have been eaten too quickly to blog about. But I never seem to get around to cooking a normal white loaf, you know one you can slice and use for sandwiches and toast. I guess because it is easy to get supermarket bread for that and make fancy bread homemade. But really baking an everyday loaf is really satisfying because you can include in your everyday meals to make them more interesting.


 This recipe has more water in than normal bread doughs and I proved it once for an hour, and second in the loaf tin for 45 minutes. This mean it was moist,  very well risen and airy, I think if I'd left it the second time for another 15 minutes it would have bloomed a bit higher. I sprinkled it with poppyseeds for extra crunch and prettiness.


Simple White Loaf
makes one small loaf


300g (2.5 cups) of strong white bread flour
1 1/2 tablespoons of sugar
3/4 tablespoon of salt
1 flat tablespoon of instant yeast
1 tablespoon of olive oil
150ml of warm water

Mix the dry ingredients together in a large bowl, then make a well in the centre and add the oil and water. Slowly incorporate the flour into the well until it combines fully, mix to a fairly sticky dough. Flour a board well and knead the loaf for a few minutes until it is smooth, you may need to keep adding flour to stop it being too sticky.

Put into a large clean bowl dusted with flour, cover with a tea towel and leave in a warm place for 1 hour.

After an hour turn the dough out and knock it back, kneading lightly for a minute. Then shape into a rough loaf shape and pop into a floured loaf tin. Prove again for 45 minutes to 1 hour in a warm place, covered with a tea towel. Preheat your oven to 180c / gas mark 4 before the proving is nearly up.


Once proved slash the top with a sharp knife, about 3 or 4 slashes should do. This will allow the loaf to rise and air to escape during cooking. Dab with some water or brush with milk and sprinkle on about 1 teaspoon of poppyseeds.

Bake for 30 - 40 minutes in the middle of the oven.

Remove from the oven, grab the butter, slice and spread and EAT!


I think this bread would take really well to other flavourings such as cheese, herbs, sundried tomatoes, whatever you can think of. Sesame seeds and a drizzle of oil would be an nice twist too. The possibilities!

I toasted it the next day and spread it with honey, it toasts extremely well.

Pin It

Wednesday, 9 March 2011

Coffee & Hazelnut Cupcakes


I think I have a cupcake fixation. I think it is because they are a) really easy to make b) cute and c) great to photograph.

I have no less than 7 (now 8) cupcake recipes in my reasonably petite recipe archive. They are a bit like brownies (I have a lot of those blogged too), adaptable and everyone loves them. I don't always like icing or frosting, it can make the cupcake overly sweet for an everyday lunchtime snack, but for special ocasions you have to. My favourite cupcake is lemon drizzle, which is also my favourite cake.


These cupcakes are again super easy and people always swoon when you mention coffee cake in any form - have you noticed that? I played around with the traditional walnut and decided to sub hazelnut instead because I prefer them. There is a mixture of whole and chopped hazelnuts, along with one of the top which gave it a slightly er, protuding appearance - oops!


I am a coffee snob and I much prefer proper fresh ground coffee to instant, but instant is always the best thing to use for baking - unless you can find coffee extract. You can get a much stronger coffee taste, and I've tried using freshly made proper espresso before, than real coffee. Trust me!

Coffee & Hazelnut Cupcakes
makes about 12 cupcakes

200g butter, softened
200g white or brown sugar
4 eggs
175g self raising flour
4 tsps of instant coffee (dissolve about 2 tsps of powder in as little water as possible, approx 75ml)
dash of vanilla extract
chopped and whole hazelnuts - about 100g in total plus extra for the top.

Preheat your oven to 200c / gas mark 6
Cream together your butter and sugar with a spoon and then whisk in the eggs one by one, mixing well to incorporate each time. Add in your vanilla, coffee and then the flour, folding in, try not to overbeat. Then add in your hazelnuts.

Line a muffin tin with cupcake cases, and fill to about 2/3 full, top with hazelnuts. Bake for 10 - 15 minutes til cooked all the way through.

I did intend to ice them with chocolate and coffee icing but trying to eke out some leftover chocolate frosting with extra coffee and milk made it go all runny, whoops! I experimented with one but the chocolate just wouldn't set, but it was tasty when topped with more hazelnuts.


P.S. The other cupcakes in the picture are lemon cupcakes, recipe in the Hummingbird Bakery Book :)

Pin It

Friday, 18 February 2011

Mushroom Ragu


We've been going veggie in this household, the last 3 and a bit weeks we have only eaten veggie evening meals (except for a couple of slip ups, one involving takeaway pizza) which has made me more creative and I have tried lots of new recipes.

This mushroom ragu is one of my favourite meals from the last few weeks because it is so MEATY and really easy to put together. Other highlights from our veggie adventure include Ottolenghi's black pepper tofu and pasta puttanesca. You must try the tofu, it will convert you if you don't like tofu- but you must use silken tofu as stated.

Anyway, onto the ragu. You can use any mushrooms you have, about 300gs serves 2 people, I had some mini portobello mushrooms (yes I admit I bought them because they were cute) which I put in. A mixture of different interesting mushrooms would be lovely, maybe with a few dried mushrooms thrown in.


Mushroom Ragu
serves 2

half an onion or 3 shallots
2 cloves of garlic, minced
1 tbsp tomato puree
approx 300ml passata or pureed tomatoes
300g mushrooms, sliced
dried or fresh herbs - oregano, thyme, basil - about 2 tsp if dried, handful if fresh.
bay leaf
dash of chili flakes
milk

Fry the garlic and the shallots in some olive oil, then add in the mushrooms and cook for a couple of minutes. Then add in your tomato puree and passata with your herbs, bay leaf and chili. Season.
Bring to the boil and then simmer very gently for about 15minutes, stirring every now and again.
I read somewhere that a splash of milk or cream at the end is lovely in ragu, so I always add some in, it takes the acidity out of the tomatoes.
Serve with spaghetti and parmesan on top (apparently parmesan is not veggie but you can sub with cheddar or maybe some nice feta?).

This is so rich and comforting, definitely cured my craving for a proper meat ragu.

Pin It

Monday, 24 January 2011

My First Macarons & Using Up Your Egg Yolks Lemon Curd

Hurray some food blogging!

I've been a bit remiss since Christmas (ok way before then) even though I've been baking lots of things and making lots of things.

Macarons have been on my lists for ages and ages, our last house had the worse oven on the planet, it couldn't even cook a baked potato evenly so I wasn't trusting it with macarons. Since we have moved we have a nice shiny electric oven which keeps the temperature even and cooks things nice and quickly. I can now bake a whole cake in less than an hour and without checking it every 2 minutes impatiently.

This also means I can now make meringues, lemon meringue pie specifically! Yum.

I used the recipe over on The Catty Life, she embued me with confidence that I Can Do It. Macrons scared me a bit, maybe I read too much into them and worried about how hard they would be.

I didn't age my egg whites, like you should, because I forgot. I still got the taste of macarons and the airy inside, but I didn't get the longer for 'feet' and a thicker shell. You can make macarons with un-aged egg whites but they won't be as pretty!


Vanilla Macarons with Lemon Curd Filling 
recipe from the catty life 

100g ground almonds
200g caster or icing sugar (I used caster which was fine)
50g caster sugar
3 egg whites - preferably aged by leaving them in a bowl at room temperature for 24 hours.
squirt of vanilla extract

Whip your egg whites still they start to foam/turn white, then add in the 50g of caster sugar slowly to combine. Whisk further til you the eggs form stiff peaks, add in the vanilla extract.
Combine the almonds and the 200g of sugar in a bowl, mix, then carefully fold them in to the meringue mix, adding it in quarters til combined.
Using a piping bag dot the mixture on to a lined baking tray, mine were about 1.5 inches wide, they don't spread too much in the oven.
Leave for 30 minutes to an hour til the mixture sets a little, it should form a 'shell' on the top.
Bake at 150 degrees celsius for 15 minutes. Keep checking, the recipe says 10 minutes but I needed a bit longer.

Remove when cool by sliding a knife under each macaron.
Sandwich with lemon curd, eat four in a row like I did.


Lemon Curd
This lemon curd is great because you can use up your leftover egg yolks from the macarons.

3 egg yolks
100g caster sugar
juice and zest of one lemon
50 grams of unsalted butter, cubed

Beat the egg yolks and caster sugar in a heatproof bowl using an electric whisk til the sugar has dissolved.
Then place the bowl over a saucepan of boiling water, add in the lemon juice and zest plus the butter. Whisk to melt the butter, the eggs should start to thicken, keep whisking. Keep an eye on the heat as you don't want the eggs to scramble. The mixture is done when it coats the back of a wooden spoon - it will thicken further as it cools.
Immediately pour into hot sterilised jars (this actually makes one jar) and seal. Keeps for 2 weeks in the fridge, after opening.

Pin It

Monday, 13 December 2010

Easy Peasy Mince Pies


I love homemade mince pies, shop bought ones are always disappointing, too much filling and horrible dry pastry. Mince pies are also very satisfying to make, they seem like a big achievement but they can be really easy.

I was given a jar of homemade mincemeat which went into these pies, it was much lovelier than shop bought - not too sweet, boozy and well spiced.

The pastry contains no liquid, just butter, flour and sugar. A lot of butter, which is what makes it stick together. The resulting pastry case is very close to shortbread but crisper and sweeter. I think these took me just over an hour to make, most of the time was spent because I had to bake in two batches.

They are not the prettiest mince pies ever, not neat but what I like to call 'rustic'. They taste brilliant though, which is what matters!


I played around with the mincemeat, the first batch had pure mincemeat but the second I added some chopped hazlenuts and grated apple (spotted that tip on Kirstie and Phil's Christmas) which added lovely texture and also meant I could eke out the mincemeat more.

Makes approximately 16 - 18 mince pies
adapted from BBC Good Food

225g very cold butter
350g plain flour
100g granulated or caster sugar
1 jar (about 300g) mincemeat
egg or milk to brush over tops

Add your flour to a large mixing bowl, then grate in all of your butter. Grating cold butter means that you have finer strands in your flour which allows you to incorporate it better. Rub into the flour til you have a texture like fine crumble. Mix in your sugar and start to knead into a dough, the butter will be warmer now and so you will be able to work into a dough. Try not to add any liquid as your pastry will shrink in the oven later on.
Once it starts to form knead briefly and it is ready to use.

Preaheat oven to 200c (180c fan) or gas mark 6.
Lightly grease a nonstick cup tin, you don't have to but I wasn't going to trust my tin entirely after last year!
To form the bottoms you can either form walnut sized pieces of dough, flatten and then spread out into each cup to form a base. Or you can roll out the dough carefully (using plenty of flour) and use pastry cutters. I found the pastry cutters a better method although a little more time consuming. Form tops using pastry cutters or small sized balls squashed out.
You can also go for a lattice effect (which may look neater than mine, I am sure) or top with chopped nuts - both of which are delicious.

Brush the tops with beaten egg or milk, bake for 20 minutes til golden brown.
Leave to cool for 5-10 minutes before taking them out of the tins.


Pin It

Monday, 29 November 2010

Lemon Drizzle Cupcakes - Gluten Free

These are properly syrupy, sticky and sweet cupcakes with a lovely lemon tang - I didn't start out intending for them to be gluten free but they are which is a great bonus! I made them by replacing the flour for ground almonds - which makes the cakes light and slightly nutty as well as gluten free.

I sprinkled the cupcakes with sugar before baking for an extra crisp top, and then drizzled them with a generous amount of syrup when the came out of the oven.

Makes 12 muffins / large cupcakes

175g unsalted butter
200g sugar
200g ground almonds
zest of 2 lemons
juice of 2 lemons
1 heaped teaspoon of baking powder
3 eggs

Cream the butter and sugar together til well combined, then whisk in eggs, fold in almonds, zest and baking powder. You can add a dash of vanilla extract here too.  Spoon into cupcake cases, leaving about 1cm from the top of the case. Sprinkle each cake with sugar, be generous!

Bake in the oven for 10 - 15mins til cooked through, they will be squidger than normal cakes but they will be cooked through. They won't rise to a dome like a flour cake either, mainly cos of the sugar topping too, but the baking powder will help them along a little bit.

for the drizzle:
juice of 2 lemons
approx 3-4 tablespoons of sugar


mix the drizzle ingredients together til you have a consistency like double cream, set aside while the cupcakes cook. as soon as the cupcakes come out prick them a few times each with a fork, and then drizzle some of the syrup over the top.

Leave to cool and then eat! These are so soft and syrupy that they make a lovely pudding with some creme fraiche or ice cream.

Pin It

Friday, 29 October 2010

Cinnamon Roll Cupcakes


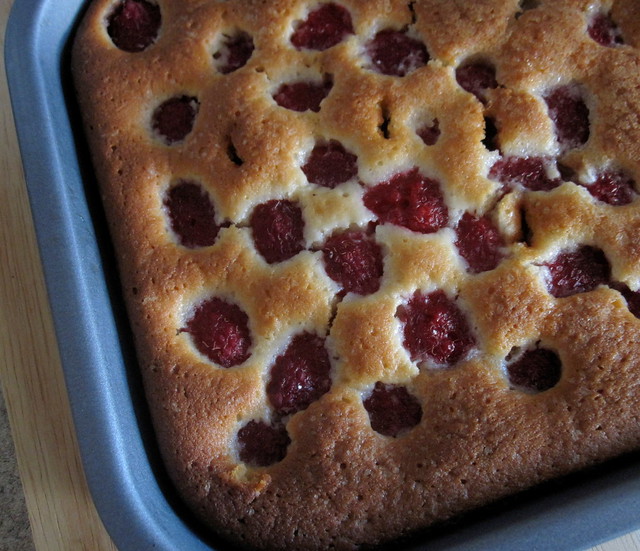
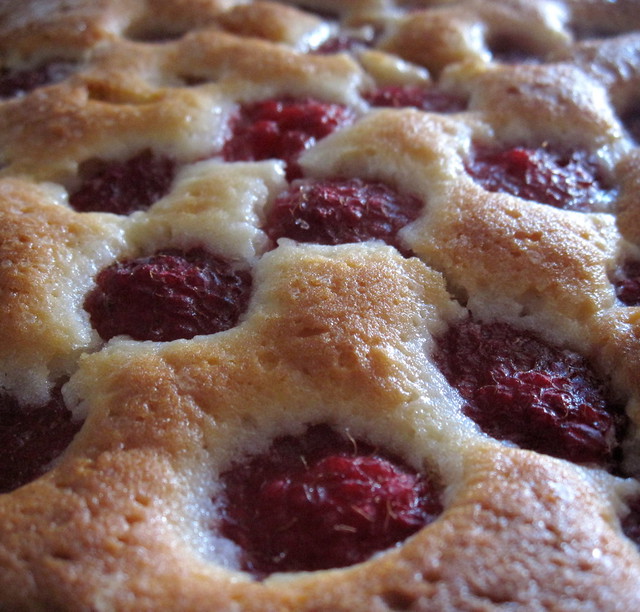
I have been a bit quiet on the food blogging front lately, I have been baking and making new things but the dark evenings are making food blogging difficult. There have been rhubarb buttermilk cakes, cupcakes, a couple of tarte tatins and the best custard ever, but sadly my camera wasn't a guest at these baking sessions!

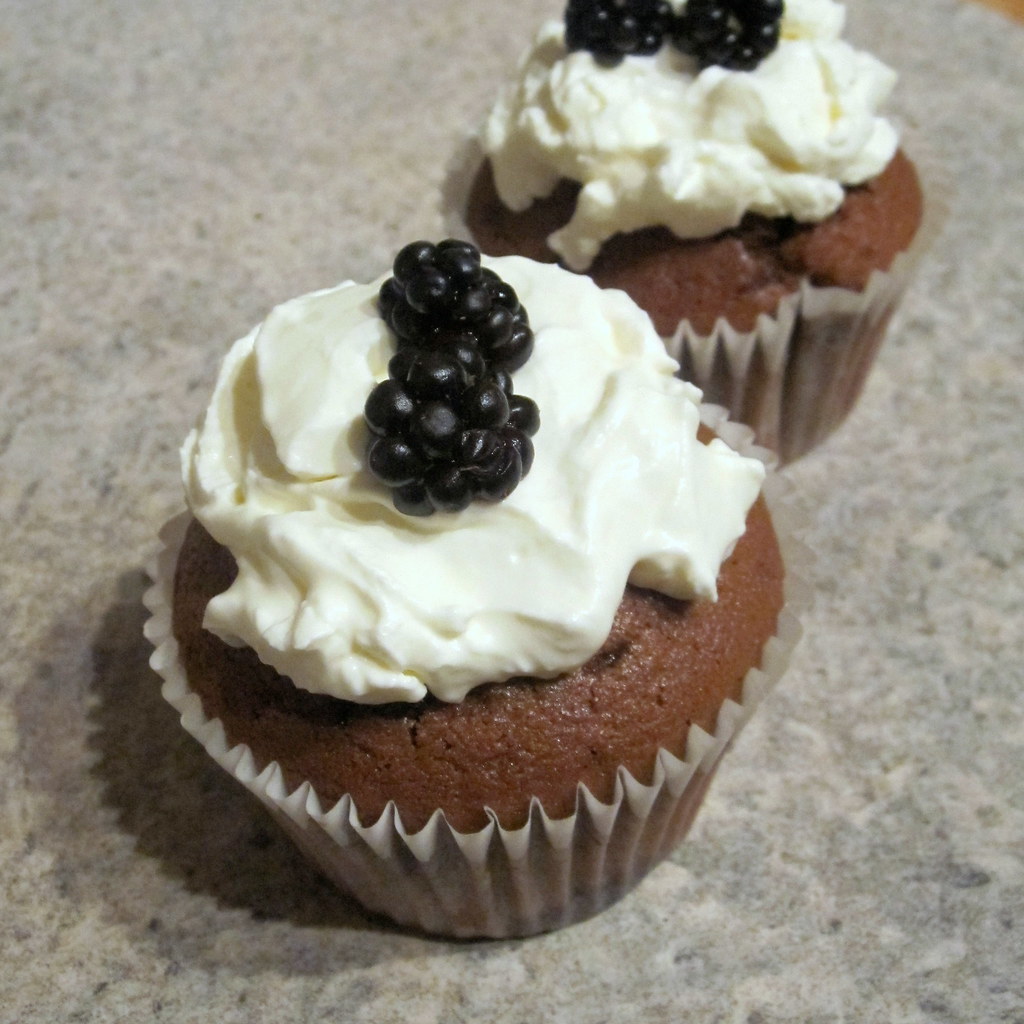
These cinnamon roll cupcakes are a little bit different, and I couldn't wait to try them. So I had a day off and the light was good, perfect!

I've never been much of a fan of cinnamon rolls, often they are dry and the cinnamon far too over powering- and also covered in sickly icing which ruins the pastry. I always thought them hard to make because of making a dough and making them cook through just right.

I spotted a couple of cinnamon cupcake recipes whilst googling due to cravings, and they seemed easy and well... ever so cute.
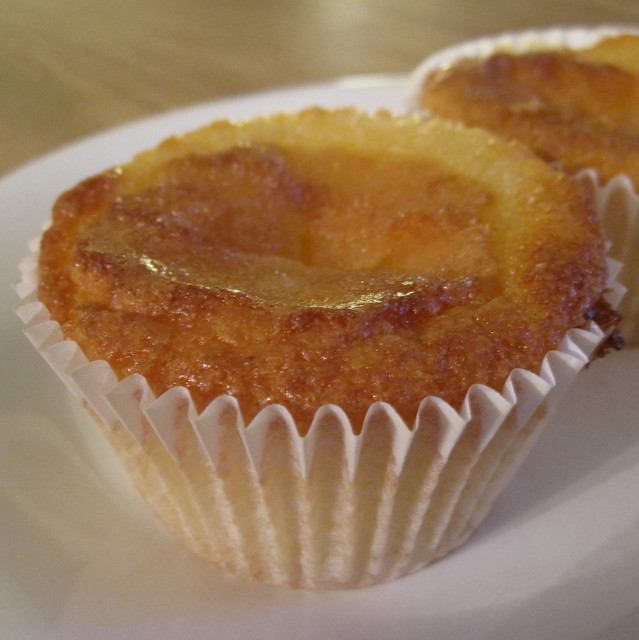
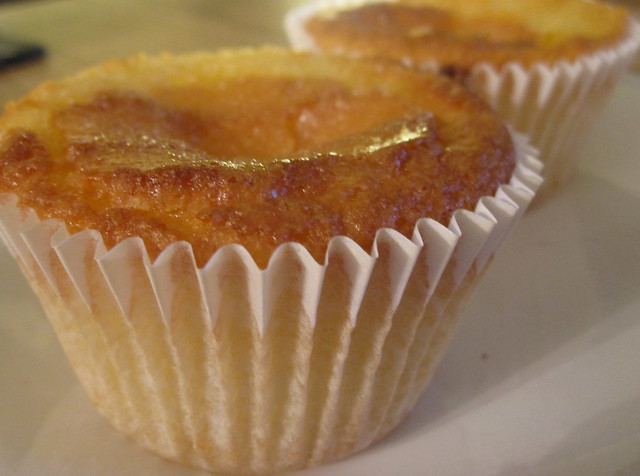
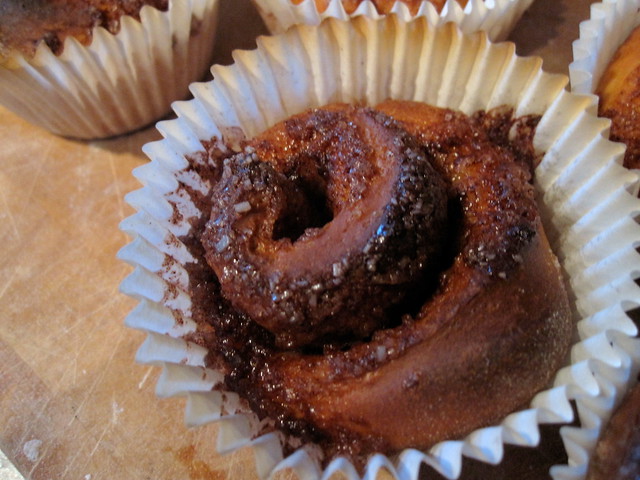
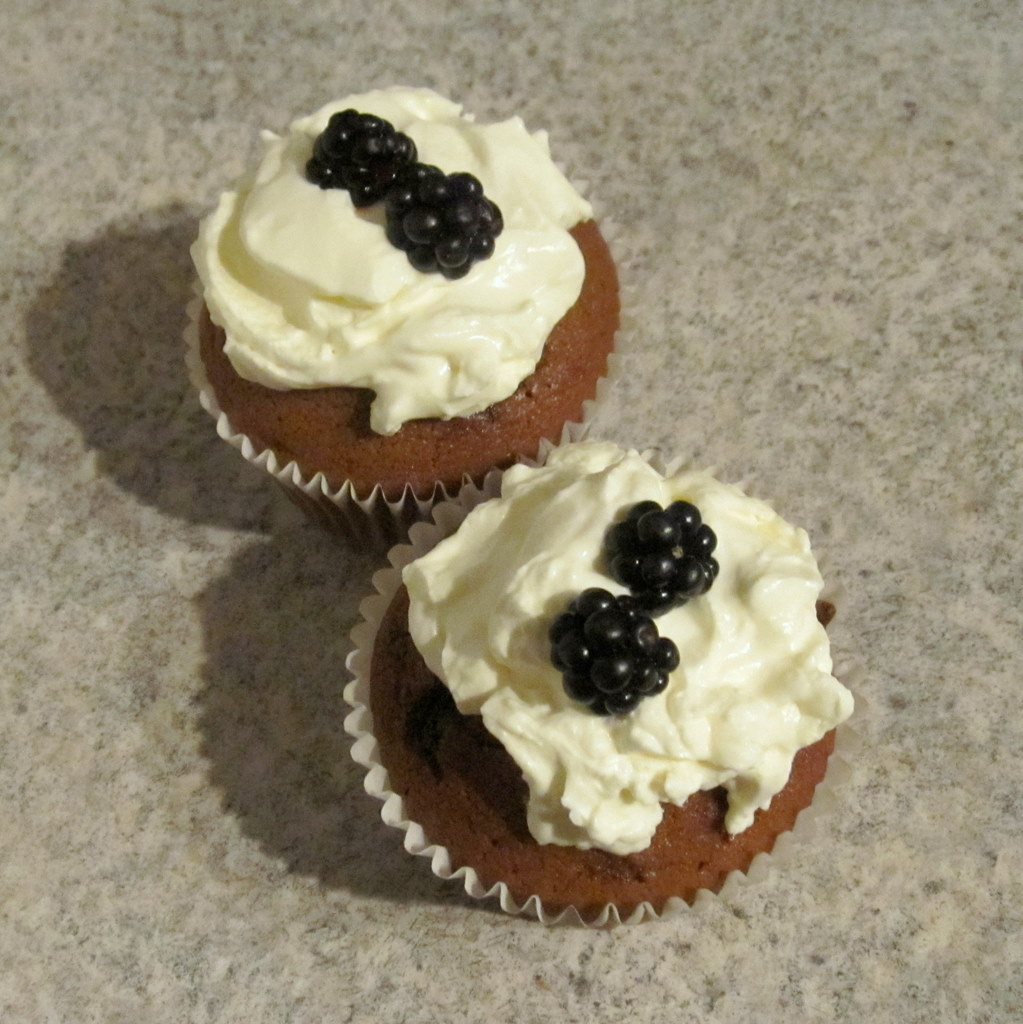
It is not a cupcake as such, it is just cooked in a cupcake tin with liners. This means each roll cooks quickly and you have instant individual portions. Because the rolls are squished up nicely in the cake liner they rise upwards and you have lots of pretty little rolls.


The recipe itself is fairly easy - you need time to wait around for it to prove and rest and you need to make sure you work it to a nice soft dough. After the first prove and the first rest you spread a wonderful mix of cinnamon, lots of sugar and butter onto a rolled out rectangle. Once rolled up and chopped into pieces you prove once more and bake in the oven. The cinnamon sugar crisps up on top and inside it caramelises for a lovely gooey caramel surprise.

You will eat at least two of these in a row when they are still warm from the oven, promise you.

Cinnamon Roll Cupcakes
Makes about 12 - 14 rolls/cupcakes

for dough
1/2 pack of instant yeast (about 3 g)
1/4 cup of  granulated sugar divided into two
1/2 cup warm milk (whole or semi skimmed)
2 tbsp melted butter
1 egg
pinch salt
2 cups of strong white bread flour
dash of cinnamon

for cinnamon sugar filling
1/2 cup of granulated or brown sugar
1 heaped tablespoon of cinnamon
approx 3 tbsp softened butter / 25g

Dissolve the yeast and half the sugar in the warm milk (whisking helps it combine), leave for 10 minutes til it is foamy.
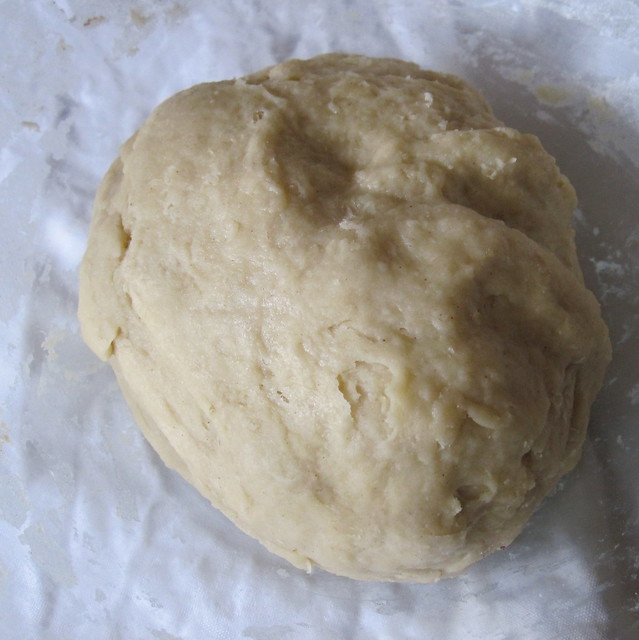
Then add in your eggs, melted butter, rest of the sugar and the salt. Mix well then sift in your flour and cinnamon. Mix until it becomes more dough like and then knead for a few minutes til you have a soft and smooth dough. Cover with a tea towel and leave to prove in a warm place for 1 hour to 1 hr 30 mins - until the dough has doubled in size.


After the first prove turn the dough out on to a board, roll it in to a rough rectangle, about 1 inch thick. Leave to rest uncovered for 10 minutes.

Preheat your oven to 400f / 200c / gas mark 6.

Roll out your dough til it is about 1/2 in thick, you want it to be rectangular so cut off the edges to form a rectangle - you can use the trimmings to make some more rolls after the first batch.

Mix together your cinnamon sugar filling in a small bowl then spread the mixture over the rectangle, leaving about 1 cm from the edge of the dough. If you have any leave over dough trimmings leave some sugar mix to spread on that.

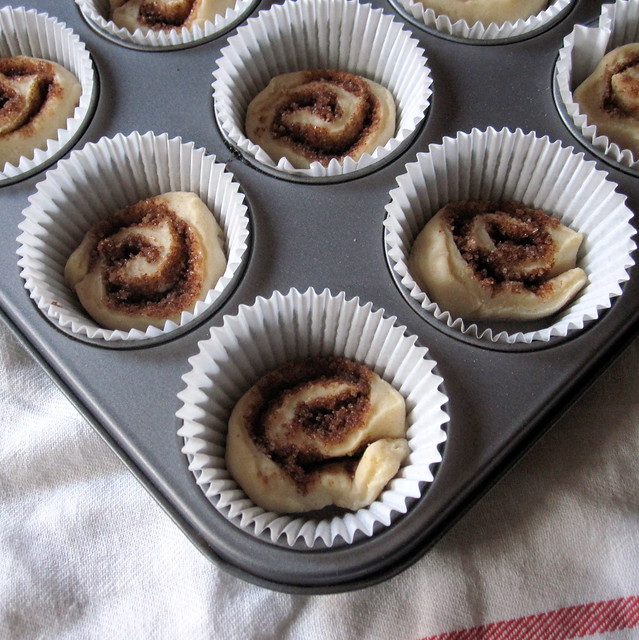
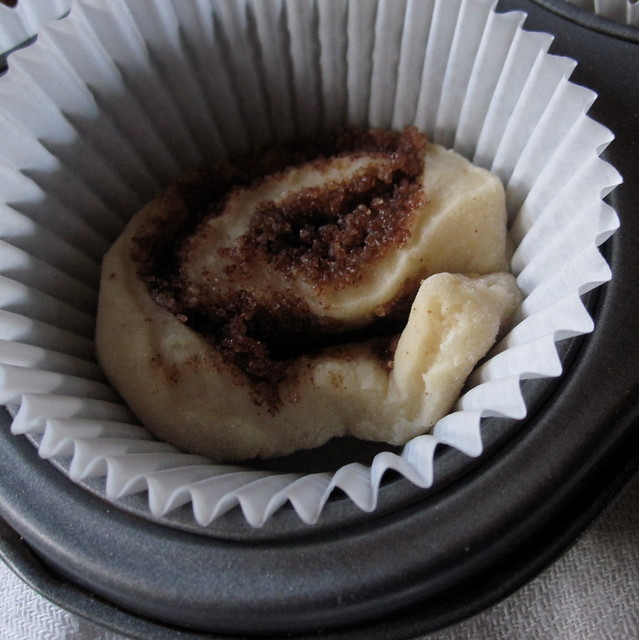
Carefully roll your dough and sugar mix in to a sausage shape, cut in to 12 pieces.
Fit them snugly into some cupcake cases in a cupcake tin, you want big muffin/cupcake sized tin and cases rather than small fairy cake type ones.

Cover the cupcake tin with a tea towel and leave to prove for 30 minutes.
Once proved bake in the oven for 10 minutes til the dough is cooked through and the sugar bubbling away. Keep an eye on it as the sugar can burn quickly - some of mine caught slightly because I got distracted with jewellery things ;)

Leave to cool for a bit before eating, they'll be very hot.
You can also add in a cream cheese or simple caramel frosting, but they are just as good on their own!

Pin It

Monday, 27 September 2010

Risotto with Baked Ricotta, Tomato and Herbs


I won something! I never win anything!
I entered a competition on the Laverstoke blog to win a parcel of their lovely buffalo ricotta and I won!
What was even better is that they sent me a whole array of goodies, I got two pots of their fresh mozarella, some of their smoked streaky bacon, a big pot of ricotta and a carton of buffalo milk.


We have enjoyed the mozarella on pizza and the bacon in sandwiches (naturally) and diced and combined with some ricotta gnocchi (I used the rest of the ricotta here). We aren't sure what to do with the buffalo milk, I could make burrata (although I do have a lot of mozarella already) or we could just have it in our tea!

Being as the ricotta was the main prize I thought I'd come up with a nice recipe for you. This risotto is slightly summery but comforting enough to warm you up on this early autumn days. The ricotta is baked in the oven for 10 minutes which makes it meltingly tender and allows you to infuse it with herbs.


Risotto with Baked Ricotta, Tomato and Herbs
serves 2

Knob of butter
olive oil
approx 200g arborio rice
2 cloves of garlic
handful of cherry tomatoes
about 1 tablespoon of fresh italian herbs - I used sage and oregano
about 1 pint hot chicken stock
parmesan
4 tablespoons of ricotta

First preheat your oven to a medium heat. Put your ricotta in a small ovenproof dish, spinkle with herbs, olive oil and seasoning. Bake in the oven for 10 minutes whilst you make your risotto base.

Chop the tomatoes into halves or quarters, add to a bowl and add a little olive oil, cider vinegar and seasoning.  Leave to stand whilst you make your risotto.

Next start to make your risotto. Melt your butter with a splash of olive oil in a large nonstick pan, add in your crushed garlic and fry for a minute. Then add in your rice. Stir quickly to coat all the rice in butter and oil. Cook for another minute. Then start to ladle in your stock in small amounts, stirring and waiting for the stock to absorb before you add the next ladle. Keep testing your rice for done-ness all the time, you might not need all of your stock.

When the rice is about 3/4 done add in your tomatoes, herbs, another knob of butter and about 2 tablepsoons of parmesan, stir to combine and melt the cheese and butter. Take your ricotta out the oven. Put half into your risotto and stir in.

Once the rice is done and everything combine in the pan serve in warmed bowls. Divide the rest of the baked ricotta between the plates and serve on top. Serve with a bit more parmesan and black pepper.

Yum!


You can find Laverstoke in branches of Waitrose and some Sainsburys. You can also buy from their website.

Pin It

Friday, 17 September 2010

Ginger Molasses Cupcakes - Happy National Cupcake Week!


Happy National Cupcake Week everyone!

I believe this week is just promotional for a baking magazine but it is a good enough excuse for me to bake cupcakes, so yay!


As the weather is getting colder and Autumn is approaching I thought I'd make something comforting and spicy. I had some muscovado molasses sugar in the cupboard and ginger seemed like a good match, a bit like sticky toffee pudding without the dates. I have iced the cupcakes with a light lemon cream frosting which goes really well against the rich sponge.

Ginger Molasses Cupcakes

 Makes 12 large cupcakes

100g butter, softened
175g dark muscovado or muscovado molasses sugar
2 eggs
dash of vanilla extract
zest of half a lemon - optional
175g self raising flour
175ml buttermilk or whole milk
1 heaped teaspoon of ground ginger - I opted for ground as I didn't want stringy bits of fresh ginger in my cakes.

Mix together your butter and sugar until fully combined, you may need to blend it slightly to combine as the sugar is thicker and denser. Whisk in your eggs one by one using a hand whisk or an electric one. Then add in the vanilla, ginger and lemon if using.
Alternately add a small amount of your flour (sifted in) and buttermilk/milk til all of it is used up.

Fill cupcake cases up 1cm from the top, you want nice full cupcakes, and bake in a preheated medium oven for 15-20minutes until cooked through.

Light Lemon Cream Icing

Ices 12 cupcakes

100ml of double cream
juice of one lemon
3 tabelspoons of icing sugar

Whisk your cream with an electric whisk until it forms soft peaks, then slowly with a hand whisk combine in your icing sugar and lemon juice. Taste for sweetness/lemonness, add more to your taste.
Chill in the fridge until the cupcakes are ready to ice. These cupcakes are best iced just before you eat them so the cakes don't get soggy. The icing will keep in a bowl in the fridge for a couple of days so you can ice as you go!
I topped mine with some cute little blackberries that I picked in my garden, they worked really well with the creamy gingery cupcake.

Yum! I hope you bake something yummy for national cupcake week.

Deepa
x

ps - apologies for the quality of the pics, it is getting dark in the evenings! :(

Pin It

Monday, 13 September 2010

Spiced One Bowl Brownies

I have encountered and made many brownie recipes, each one different from the next in technique and flavour. I like them with coffee, with nuts, even with bacon, but sometimes I want them to be quick and easy - because everyone needs brownies in a hurry sometimes.

These recipes require something which I don't normally ever use in baking - a microwave. The butter and chocolate is melted in the microwave for a couple of minutes and then the other ingredients stirred in one by one.

I've adapted the recipe to include some spices (something that feels very autumnal!) - ginger, cinnamon and smoked paprika - trust me the smoked paprika is good.


I much prefer very gooey brownies but my husband prefers his more like a moist cake - these are more of a cakey brownie with a lightly crisped top. If you like gooeyness then use about 50g less of the flour.

Spiced One Bowl Brownies
adapted from all recipes

NB  - I made this recipe again but with only 75g of flour and 25g cocoa powder, it gave a gooier brownie with a crisper top, good if you like them this way!

100g good quality dark chocolate (70%), broken in to pieces
70g butter
100g sugar
2 eggs
1/2 tsp vanilla extract
150g plain flour
1/2 tsp baking powder
1/2 tsp ground ginger
1/2 tsp cinamonn
1/2 tsp smoked paprika

Preheat your oven to 400f, 200c or gas mark 6

Put the butter and chocolate into a large microwavable bowl, microwave on high for 2 minutes.
Remove from the microwave and stir together til the chocolate is completely melted in with the butter.
Stir in sugar til combined.
Stir in your eggs one by one and then add in your vanilla.
Sift in your flour, baking powder and spices, fold in to combine.

Pour into a greased and lined, or non stick, square 9inch pan. Bake in the oven for 20-25 minutes until just done - your knife should come out with a few crumbs when inserted - the great thing about brownies is that it isn't a disaster if they are underdone because it equals more gooeyness!


Pin It

Monday, 6 September 2010

Raspberry Buttermilk Cake


I think this may well be the most perfect cake I have made. Hurray!

I cooked this cake in my lovely new non stick brownie pan, to get little squares of cake all neat and tidy. Yes I am weird.

I have made this cake before with blackberries and it was good then, but this time I spent a bit more time whisking to get a light fluffy batter, I had a nice cake tin and my oven was behaving.

I am a big fan of buttermilk in cakes, it stops any cake from becoming dry, and makes it easier to mix.
I also swapped out half the sugar for honey instead, which didn't affect the flavour (in fact I think all sugar would have been too sweet) and makes it a teeeeny bit healthier (ish).You will also notice that this cake only has 50grams of butter in it!


This cake is very versatile, as I mentioned I have made it with blackberries before, you can swap out the raspberries for any small soft fruit - blueberries, strawberries-  maybe even some small plums halved. I might even give it a go with rhubarb as our plant has gone a bit huge! You could even use the cake mixture as a base for a nice chocolate chip cake - oooh now there is an idea! Anyway I am going off on a tangent here...

I made these with some sweet local raspberries from my local market, they are nearly at the end of the season now and this cake is a lovely last wave to the summer fruits.

Raspberry Buttermilk Cake
adapted from Smitten Kitchen & Gourmet

50 grams of unsalted butter (1 stick)
75g of caster sugar (1/3 cup)
75g honey (1/3 cup)
1 large free range egg
1/2 teaspoon vanilla extract
zest of half a lemon - optional
1/4 teaspoon of salt
130grams of self raising flour (1 cup)
1/4 teaspoon baking powder
110ml buttermilk (1/2 cup) - you can make buttermilk by adding 1 tablespoon of vinegar to cream or milk, leave for 10 minutes before adding.
150g fresh raspberries (1cup)

Cream together your butter, sugar and honey - in a mixture or using an electric whisk is best - til light and fluffy. Add in your egg and whisk to combine. Then add in your vanilla and zest and combine again.

Then alternately add in your flour and buttermilk, adding a small amount of each, combining and adding the next. Have your mixer on a medium setting and your whisk on a medium too.

Once nicely incorporated spoon the mixture into a 9 inch round or square cake in, non stick or lined with paper. Then lay your raspberries on top, I started off trying to be nice and neat but then by the time I tried to squish all the berries in it was a bit more messy!


Sprinkle with 1 tablespoon of sugar and optionally you can also drizzle on some honey.


Bake in the oven for 20 - 25 minutes until cooked through and golden brown.

Leave to cool for 10 minutes before turning out on to a board and then on to a plate.

UPDATE: I made this again a few days later with Rhubarb (yes we ate the raspberry one really quickly) and it was really good. I cut 2 sticks of rhubarb in to small chunks, sprinkled it with 1 tbsp sugar and let it sit for a 5 minutes then scattered over the top of the cake and baked in the oven as normal. I also added some ground ginger to the batter, yum!

Pin It

Wednesday, 1 September 2010

Blueberry & Coconut Boy Bait


I've been hearing about boy bait for a while from smitten kitchen, domestic sluttery and some lovely twitter friends including alice of Snap Dragon Beads.

Such a cute name for a cake, I mean it is really just a cake but if you call it boy bait then everyone wants to makeit -  Especially if it has blueberries in. And then I went all out and replaced the buttermilk with some lovely coconut milk instead.

This cake is super easy to make, moist, sugary and has the best name ever.
The coconut flavour only comes through slightly, but it makes up for that by adding moistness and sweetness.
I think I'll add a few tablespoons of desiccated coconut next time.


Blueberry & Coconut Boy Bait - adapted from Domestic Sluttery

125g of brown sugar
1/2 tbsp salt
125g unsalted butter
125g of self raising flour
2 eggs
1 150ml mini tin of coconut milk (these are readily available in most supermarkets, and very handy)
1 punnet blueberries - approx 125g

for topping:
3 tablespoons brown sugar
1 tsp cinamonn
handful of blueberries


Heat oven to gas mark 4 / 350f / 180c.

Cream together the butter and the sugar, then add in your eggs one at a time, combining each time before adding the next.
Add in the flour slowly and then pour in the coconut milk. Stir to combine and then add in the blueberries and the salt.
Pour into a 9 inch round or square cake in. Top with the rest of the blueberries, cinnamon and sprinkle over the sugar generously.
Bake in the oven for 50 minutes until cooked through and golden brown.
Dust with icing sugar, slice and transfer to your mouth!


Pin It