Showing posts with label cooking. Show all posts
Monday, 4 March 2013
Kitchri - Yellow Lentil Rice (Gujarati Recipe)
I'm probably not selling this recipe very well in the title, but it is a really nice rice dish - eaten a lot in Gujarati homes but there are various versions from other parts of India too. It is dead cheap to make, soothing and simple, so good for poorly tummies, which there are plenty of during this long drawn out winter. It is made up of basmati rice cooked with yellow mung dal along with a little garlic, salt and turmeric simmered in the water.
It goes with 'kadhi' which is a yoghurt based spiced 'soup' (for want of a better word) which is poured liberally over the rice. You can also eat it with a thin dal soup (again for want of a better word) or have it alongside any 'curry' with sauce.
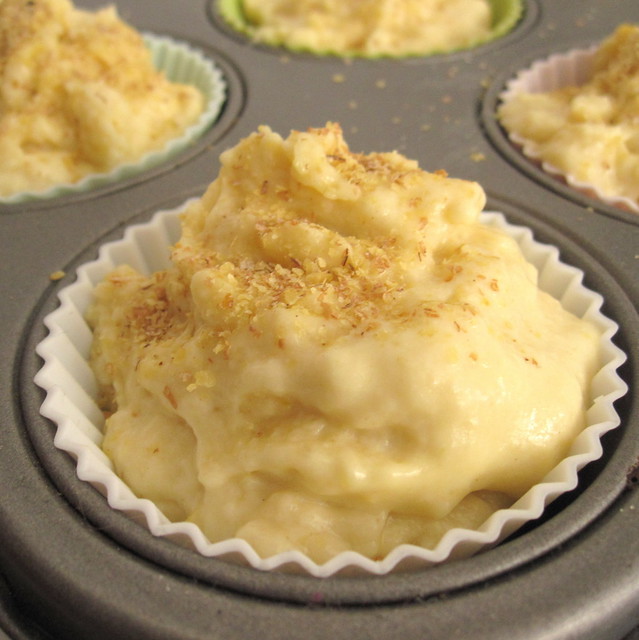
And if you are under the weather just eat it warm on it's own or with a dollop of plain yoghurt. It is also ridiculously easy to make.
You'll find yellow split lentils in larger supermarkets (I found a bag in Morrison's!), Indian supermarkets and possibly larger health food stores. And, randomly, on eBay. Normal lentils won't work for this as they are too big, also these split lentils don't need soaking, you can use them straight away.
Kitchri
Serves 4
200g basmati rice
200g yellow split lentils
1/4 teaspoon of turmeric
1/4 teaspoon salt
1 clove of garlic
Sunflower or mild olive oil
Boling water
Heat the oil in a large saucepan and then add in the rice and lentils and stir fry for a few minutes.
Then add in the garlic, salt and turmeric and stir fry for another minute.
Add the boiling water.
Bring to the boil and then simmer on a medium heat til the water is nearly all absorbed.
Turn down to the lowest heat, place some foil directly on top of the rice, put the lid on the pan and leave for 5 minutes to cook.
Remove the foil, check it is cooked through, fluff with a fork and then put lid back on til you are ready to serve with dal, kadhi or any sauce'curry' .
I'll be blogging dal soup and kadhi soon, so watch this space :)
Monday, 9 April 2012
Pesto Pull Apart Bread
This Pesto Pull Apart Bread is a real crowd pleaser, I think tearing big chunks of freshly baked bread slathered in pesto is just about anyones favourite thing to do. I took this bread along to The Secluded Tea Party Unbirthday this weekend as part of the pot luck spread, along with some sundried tomato palmiers (more on that soon). It looks kind of awesome, all big and gnarly on the table and tastes even more awesome.
This bread takes time time to make but if you are confident enough making a normal bread dough then you'll be fine here. It is quite a nice bank holiday activity, something you potter in and out of the kitchen at regular intervals to do the necessary stages.
I've seen this as a sweet filling before too, filled with cinnamon sugar, and also in other savoury ways - sun dried tomato, cheddar & mustard.
Pesto Pull Apart Bread
based on the recipe from Miss Igs
For the dough
1 cup of warm water
1 packet (7g) of fast action yeast
2 tablespoons of olive oil
2 cups of strong white bread flour
2 tablespoon of sugar
1 teaspoon salt
1 egg
For the pesto
Large handful of fresh basil
2 cloves of garlic
1/4 cup of toasted pine nuts (toasted in a dry pan)
approx 1/8 cup of grated parmesan or hard cheese
extra virgin olive oil
Mix together the warm water, yeast and oil in a large bowl. Leave for 5 minutes til the yeast starts to bubble.
Then add the bread flour, sugar and salt to the yeast mixture. Mix well with a wooden spoon (or a mixer if you have one, I have one on my wish list!) until all incorporated in to a dough, add the egg in and mix to incorporate again. Your dough might be a bit wet here so add in some more flour to form into more of a kneadable dough. Knead lightly in the bowl for just a couple of minutes. You'll not need to worry so much about kneading if you are using a mixer with a dough hook.
Cover the bowl with a tea towel and leave in a warm, dry place for at least an hour to prove. It should double in size.
You need to make your pesto now. Just blitz all the ingredients in a food processor or mini blender. Add some oil to begin with and then add more as you need to loosen the mixture.
After proving knock back the dough, flour a board well and roll out thinly in a rough rounded square. Spread the pesto over the dough.
Cut the dough into 4 long strips. Then pile the strips on top of each other, then cut into little square stacks. Then stack the little squares into a oiled and floured loaf tin. Leave to prove for another 30-40 minutes.
Preheat your oven to 170c / gas mark 3. When it is proved bake in the oven for 30 - 35 minutes until golden brown and cooked through. Keep an eye on it in case it starts to brown too much, you may need to turn your oven down, mine went quite brown in the end.
Remove from the tin about 5 minutes after it has come out of the oven. Cool on a wire rack. Tear into it when it is still slightly warm / as long as you can bear without eating it.
Labels:
baking,
bread,
Cambridge food blogger,
cooking,
italian,
pesto,
pull apart bread,
recipe
Friday, 6 April 2012
Recent Eating
I was looking at my blog last night and realised how neglected it has been recently, poor blog. I've been busy with my new job (which is great) and making jewellery but I have still been cooking some nice things. I'm pretty good at snapping pics on my phone and putting them on Instagram, which has been about all the blogging I've been doing lately. Here are some of my favourite things from the last month.
Some other things that didn't make it on to my photo album but are definitely worth trying:
Crispy Baked Onion Rings - I made these twice in one week. Enough said!
Creamy Avocado Pasta - Avocado is one of my favourite things to eat, this pasta dish is super quick and I found I didn't even need to add parmesan, which is a first.
Crispy Tofu Strips - I am slowly learning to like Tofu, I think it works well in a handful of dishes. Silken tofu is normally my favourite, this is a great way of using firm flavoured tofu (I used basil, but you can also get smoked) in a healthy way.
Teacake in Shepreth - My new favourite tea room / cafe. And it happens to be 2 minutes away from my office. Win win.
Carrot Fries - almost guilt free chips. Almost.
Ta Da! A new blog post. That wasn't so hard :)
Glazed sesame chicken, thai green butternut squash curry and fluffy basmati rice.
This chicken is SO good, it didn't think it would cook in time and worried it would burn, but it was great. The skin was like fried chicken, ridiculously good. Chicken recipe courtesy of Jamie Oliver
Bubble and squeak cakes with roasted fennel and squash warm salad.
My first go at trying roasted fennel, I always thought the aniseed would be too overpowering but it is just right, adapted from River Cottage Veg, I missed out the spelt to keep it simple, the flavours were still there and it all worked together really well.
The bubble and squeak cakes were some leftover mash, shredded cabbage, an egg, garlic, lots of parsley and seasoning, fried til crispy on both sides.
Clandestine Cake Club!
I was so pleased to make the latest cake club meeting at La Tasca in Cambridge. Lyn, the founder of Clandestine Cake, was our guest of honour, it was lovely to meet the lady who started it all off. There are now over 60 clubs in the UK and across the world, find your club here. I baked a rhubarb victoria sponge (unpictured, it tasted good but was pretty unphotogenic!). I love going to cake club, I always come back brimming with ideas and high off a sugar rush.
Some other things that didn't make it on to my photo album but are definitely worth trying:
Crispy Baked Onion Rings - I made these twice in one week. Enough said!
Creamy Avocado Pasta - Avocado is one of my favourite things to eat, this pasta dish is super quick and I found I didn't even need to add parmesan, which is a first.
Crispy Tofu Strips - I am slowly learning to like Tofu, I think it works well in a handful of dishes. Silken tofu is normally my favourite, this is a great way of using firm flavoured tofu (I used basil, but you can also get smoked) in a healthy way.
Teacake in Shepreth - My new favourite tea room / cafe. And it happens to be 2 minutes away from my office. Win win.
Carrot Fries - almost guilt free chips. Almost.
Ta Da! A new blog post. That wasn't so hard :)
Labels:
Cambridge food blogger,
clandestine cake club,
cooking,
eating,
recent,
update
Sunday, 1 January 2012
Vegetarian Pho
First of all, Happy New Year everyone! Hope you all had a lovely Christmas.
I've never had Pho before, but I've read lots about it and it seems to be one of those dishes which is amazing and also comes with strict rules about what should be in it. I'd never come across Vegetarian Pho before until I saw it on Miss Igs' blog recently.
Whilst I don't believe detox works, after all the indulgences of Christmas and New Year this is perfect to cut through all the roast dinners, cheese boards and tins of chocolate consumed in such a small amount of time.
This recipe appeals to my organised / neat freak nature as you assemble all the ingredients in to little bowls ready to put together when the broth is done. Some chopped coriander, sliced spring onions, diced chillies, steamed pak choi and thin strips of fried smoked tofu. You can make all this up before serving or lay them out on the table and let everyone garnish as they eat.
Click here for the full recipe on Miss Igs' blog (and lots of other lovely recipes from a fellow Cambridge food blogger).
As mentioned I had shallow fried smoked sesame tofu (lovely, full of flavour) and some steamed pak choi with my Pho. I've got lots of broth leftover too, which I am going to stash in the freezer for a day when I am struck down with a rotten cold.
Labels:
broth,
Cambridge food blogger,
cooking,
new year,
pho,
recipe,
soup,
vegetarian,
winter
Thursday, 8 December 2011
Beetroot & Goats Cheese Tart
What is the difference between a savoury tart and a quiche? Something I am sure you will all ponder over for many hours...
This is a terribly simple recipe which not only looks impressive (purple food always does) but tastes brilliant too. If you cheat and buy pastry (I'm not telling anyone) then it is even easier.
I have discovered some wonderful goats cheese recently, from the excellently named Wobbly Bottom Farm, they do a range of goats and cow cheeses made from goats and cows on their own farm. My favourites are the soft flavoured goats cheeses, rolled in all manner of lovely things such as piri piri seasoning, black pepper or herbs. Yummy!
For my readers in Cambridge, they sometimes appear at local markets but the cheese is also stocked at the Cambridge Farmers Market outlet on the corner of Lensfield Road/Regent Street.
Beetroot & Goats Cheese Tart
makes one 28cm round tart
First of all either make your pastry, or roll out a sheet of bought shortcrust pastry. Oil or butter your tin, mine was non stick anyway but I have pastry paranoia so I greased it anyway. And then line your tart tin with your pastry. Leave about 1.5 inches overhanging, line with tin foil and fill with dry beans or rice. Blind bake for 15 minutes at gas mark 5 / 180c.
Whilst the pastry blind bakes make your filling.
For the filling you'll need:
3 small beetroots - peeled and grated
3 medium eggs
about 50g of parmesan, finely grated
50ml of milk
1 teaspoon of creamed horseradish
small handful of chopped parsley
seasoning
About 75g of soft crumbly goats cheese
Whisk your eggs in a bowl and then mix in your milk. Then add in the rest of the ingredients except the goats cheese and stir to combine.
Remove the pastry from the oven when it is light golden brown and nearly cooked all over (keep the oven on), remove the beans/rice and the foil. Whilst it is still fairly warm trim the excess pastry from the edge of the tin. Leave to cool slightly for 5 minutes before adding your filling in, hot pastry and cold eggs don't mix too well! Scatter the crumbled goats cheese over the top of the tart, or slice into rounds and place on top.
Return to the oven for 15- 20 minutes until the mixture has a slight wobble in the centre, but is cooked everywhere else. Cool for as long as you can bear before eating it!
P.S. I am sorry for the Instagrammed photos, normal properly taken photos will return some day, probably when the light levels are better.
Labels:
autumn,
baking,
beetroot,
Cambridge food blogger,
cooking,
goats cheese,
quick,
recipe,
tart
Wednesday, 23 November 2011
Cooking from the River Cottage Veg Book
Never before have I made so many recipes from a recipe book before. I think I am like a lot of people, I buy cookbooks promising to try all the recipes, I look at the pretty pictures, feel my stomach grumble, make one or two and then resign it to the shelf. Google is a lot quicker if I need to find a recipe in a hurry so my books get neglected.
I've loved the recipes from this book, and we've been watching the TV programmes too. Mr. Giraffe became a vegetarian nearly a year ago so I'm really glad to find a book full of many recipes that are inventive and veggie.
Our favourite by far is the broad bean and pea bruschetta - we use frozen peas when there are no broad beans in season - topped with crumbly goats cheese or feta. A small portion makes for a lovely side to a plate of pasta too.
We've also made the polenta chips, the mushroom stoup (make lots of this, it tastes better the next day), beetroot soup, aubergine parmigiana (Sainsburys basics 'italian hard cheese' is veggie and also tastes pretty good) and the beetroot tarte tatin.
Next on the list is the rest of the book - but more specifically the cauliflower pakoras, chickpea ketchup curry (for a day when we are feeling lazy!) and the beetroot and chocolate ice cream.
I cannot recommend this book enough, whether you are veggie or not, it is huge so you'll find something you'll like. And I agree with Hugh that we all need to eat less meat, not no meat but a lot less than we eat now.
I've also forgiven Hugh for cutting his hair, this book has made up for him having run of the mill short hair.
Labels:
book,
Cambridge food blogger,
cooking,
everyday,
meals,
review,
river cottage,
veg,
vegetarian,
veggie
Tuesday, 8 November 2011
Sort of Sea Spiced Aubergine
Whilst it might seem a cliche, since Mr. Giraffe became vegetarian we've been eating a lot more aubergine, a lot of people describe it as being meaty - although I don't really see that - but it is very substantial which means it is easy to make it the centre of a meal.
This is my 'sort of' sea spiced aubergine, it is probably not very authentic but it has all the right mix of flavours - deep savoury, chilli burn and a little sweetness. This always takes me longer to make than I think, due to the fact that aubergines take SO LONG to roast. After they are roasted the dish comes together pretty quickly though.
Sea Spiced Aubergine - serves 2
2 medium sized aubergines
olive oil
2 fresh chillies
For the sauce
2 tablespoons of dark soy sauce
2 teaspoons of Tamari (or just add in another tablespoon of dark soy sauce)
2 teaspoons of chili bean paste (or any good chilli sauce, or sambal oelek)
3 cloves of garlic, minced
1 inch piece of ginger, grated
1 teaspoon of sesame oil
2 teaspoons of honey
juice of 1/2 a lime
Heat the oven to 180 degrees c / gas mark 4.
Line a baking dish with foil and wrap your aubergines and chillies up in the foil, drizzle with sunflower or a mild olive oil before you seal. Roast in the oven for about an hour to an hour and a half, about half way through remove the chilis and turn the aubergines. Slice the chillies in to small pieces. If you don't want too much heat you can use 1 chilli, or leave the seeds out.
For the sauce mix all the ingredients together in a bowl with the roasted chillies.
When the aubergines are ready, remove from the dish and let them cool so they aren't going to burn your hands off when you slice them. They should be very very soft and collapsed slightly.
Cut your aubergine into rough chunks, about 2 inches.
Heat up a large frying pan or a wok, add in some sunflower oil and then your aubergines. Fry for a minute and then pour in your sauce, followed by a little hot water if it is a bit dry. Simmer for 5-10 minutes on a medium to low heat.
Serve with egg fried rice or fine egg noodles.
Labels:
aubergine,
blog,
Cambridge food blogger,
chinese,
cookery,
cooking,
food,
recipe,
sea spiced,
vegan,
vegetarian,
veggie
Sunday, 23 October 2011
Apple & Maple Syrup Flapjacks
I have a slightly traumatic history when it comes to flapjacks. Ok maybe not traumatic, but unsuccessful certainly. Every time I've made them they've stuck hard to the pan, requiring a chisel to get them out and extra strong teeth to eat them. I think I even chucked a baking tin in the bin once because they stuck so hard.
The other thing about flapjacks and me is the time I worked for an oat seed company, every year at a big event we did there would be trays and trays of flapjacks to give away to visitors. Being as we had to be at the show at about 7am every day and there was little time for eating most of us survived on the flapjacks, and by day three I didn't want to see them ever again til the next year.
Anyway, a craving Mr. Giraffe had today and a rush of confidence in my baking skills lead me to make these. I used the recipe from The Pink Whisk (fancy iPad to view them is optional but useful when you are in the kitchen!) but subbed the golden syrup for maple syrup, plus I added another tablespoon of it in for extra flavour. As part of my extra flavouring a lovely local apple was grated into the mixture along with some cinnamon.
Apple & Maple Syrup Flapjacks
adapted from The Pink Whisk
160g butter
115g sugar
2 tbsp of maple syrup
1/2 tsp of cinnamon
240g of porridge oats
1 apple, grated
Preheat your oven to 160c fan / 180c / gas mark 4
Melt the sugar, butter and maple syrup in a saucepan over a low heat. Once the sugar is dissolved, turn off the heat and add in the other ingredients and stir well.
Pour into a greased and lined brownie tin.
Bake in the oven for 20 minutes. Leave to cool for a few minutes and then cut into pieces. Then leave to cool in the tin before removing the pieces.
Ruth points out that the mix will look quite pale, and although you don't get the nice golden brown-ness, it does mean that the mix doesn't set rock hard in the pan like my past attempts! This way you'll get lovely soft flapjacks.
Labels:
autumn,
baking,
Cambridge food blogger,
cooking,
flapjack,
oats,
the pink whisk
Thursday, 8 September 2011
German Apple Cake
I love apple cake, it is a very autumnal thing and being as it has felt autumnal for about 3 weeks now I think it is the perfect cake to be baking at the moment. I'll start off with a little disclaimer, I didn't bake this cake, Mr Giraffe did, but it was so yummy that it needed to be blogged about.
This recipe is from Honey & Jam - it is a very simple sponge with none of the usual spicing that most apple cakes have, the sponge is very buttery and light and the apples really stand out. The apples aren't peeled which works suprisingly well, especially if you have good quality apples.
I think we/I will be making this again soon!
Labels:
autumn,
baking,
Cambridge food blogger,
cooking,
fruits,
german apple cake
Thursday, 1 September 2011
Cambridge Clandestine Cake Club & Banana Oat Cake
Yesterday I went to the 2nd Clandestine Cake Club for Cambridge held at the fantastic Greens Coffee Co. in Cambourne. You really have to love cake to go to one of these, and fortunately I do. Everyone brings a cake along and then you spend the evening drinking tea and eating your away around all the sugary offerings.
There we over 20 cakes this time and every one looked amazing. I didn't try all of them but I managed 4 slices whilst I was there and took some home - much to Mr Giraffe's delight.
My offering was a Banana and Oat Cake with Elderflower Cream Cheese icing. The cake was originally meant to be vanilla sponge but it came out of the oven dense and flat, and my buttercream failed too. Luckily I'd also made banana bread so I jazzed that up with the icing (made at work the next day, before the club!) which worked really well.
Yummy.
The evening is organised by Miss Sue Flay of tea party fame. I'm really looking forward to the next one.
There are lots of Clandestine Cake Clubs being held by other people around the country - check the website to see if there is one in your town.
The banana loaf recipe started off wanting to be the one from the Hummingbird Bakery book but I edited it so much it pretty much is a different recipe now. I subbed out a lot of the sugar, used less flour and added oats.
Banana Oat Cake
140g sugar
2 eggs
2 bananas (about 200g peeled weight), peeled and mashed.
140g plain flour
40g porridge oats
1tsp baking powder
1tsp ground cinamonn
1tsp vanilla extract
1tsp ground ginger
100g unsalted butter, melted and cooled.
Preheat oven to 170c / gas mark 3. Grease and line a loaf tin.
Whisk the eggs and sugar together until well combined. Then add in the mashed bananas and mix well again. Fold in the dry ingredients carefully, and then pour in the melted butter and fold again. Pour into the prepared loaf tin. Bake for 35 - 45 minutes until cooked through.
Elderflower Cream Cheese Icing
I really struggle with buttercream, it tends to split very easily for me. I love cream cheese icing because it is just as decadent but so so much easier to make. This recipe is based on the Jamie Oliver recipe that goes with his carrot cake.
100g mascarpone cheese
200g full fat cream cheese
2 tbsp of elderflower cordial
85g of icing sugar
Mix all the ingredients together in a bowl and then spread all over your (cooled) cake.
Sunday, 14 August 2011
Ridiculously Good Oreo Fudge Brownies
Bet you are already thinking about when you can next bake.
I am very late to this party, I saw the brownies on Lorraine Pascale's show a few months ago (ok it was January, doesn't seem that long ago!) and ooohed over them and then never got round to making them, which is my usual trick. Ireena made them and so did Katie and I ooohed again.
I kept on buying oreo cookies and they'd get opened and suddenly there were no more oreos. So I bought a pack and hid them at the back of the cupboard for a few weeks, and finally today I made oreo brownies.
I make a lot of brownies but I think these might be the best. Rich, sweet and almost moussey in the middle (from whisking eggs, something I've never done for brownies) and very crispy on top - and then you get an oreo in there too - magic!
You should definitely try these, I think they'd be great in place of birthday cake or even for a dinner party. Or for, you know, eating two in a row. The brownie base itself without the cookies is a great one.
I made three alterations - I didn't include the 2 extra egg yolks - mainly because I didn't have enough eggs but really I felt it was a bit unnecessary. The chocolate was just broken into small pieces, I think grating chocolate would get melty and messy! And I had some fudge chunks lying around so I put those on top before baking, they melted into the batter and then when cooled became crispy and sticky, yum!
Recipe on BBC Food.
Tuesday, 9 August 2011
Lavender Wholewheat Scones
Until now I have only ever used lavender in my bath, probably like most of you. There are a few things that lavender really works with especially sweet things. I've heard lovely things about lavender panna cotta, I've eaten lavender shortbread before. I've seen some people put it with lamb but I'm not entirely convinced about that.
I had been given some very nice strawberry and rhubarb jam and the best thing to do when you get jam is make scones! The perfume of the lavender in the scones works really well with the sweet jam, and I think the wholemeal flour makes it nutty, meaning the lavender doesn't overpower.
I am by no means an expert on scones yet, these still didn't have the required oomph that I was looking for, I think they need self raising flour, which I keep forgetting to buy. And in fact I keep forgetting to get more plain flour too, hence the reason for wholemeal - which worked out nicely anyway!
I used this recipe, subbing with wholemeal and 2 teaspons of baking powder. And my lavender was in the form of homemade lavender sugar (grab a bunch of lavender flowers, hang upside down for a month, remove purply bits, add to a jam jar of caster sugar, wait a week), so I just replace the plain sugar with that.
The lavender comes through really well, not too soapy and just the right amount of perfumeyness.
They are perfect for a tea party!
Thursday, 26 May 2011
Candied Ginger Brownies
You'd think I would have enough brownie recipes on here but I don't think there is such a thing as too many brownie recipes, or too many brownies!
Lately I have been more of a fan of brownies with things in them, before I was more of a chocolate nut and just wanted them to be as chocolatey as possible - which is obviously no bad thing either. But sometimes it is fun to experiment!
Spiced brownies are lovely and these candied ginger ones give you a good hit of ginger in each bite, and a bit of texture from the candied coating.
If you really like ginger I would make your pieces big but if you don't chop them up finer than I did, it will all work out fine either way. These are semi gooey brownies, with a nice crisp top.
100g good quality (70% cocoa or more) dark chocolate
70g butter
100g caster sugar
2 eggs
1/2 tsp of vanilla extract
75g self raising flour
1 tsp of baking powder
25g cocoa (or just use more flour)
100g candied ginger, chopped
Preheat your oven to 400f, 200c (180c fan) or gas mark 6
Break your chocolate into pieces and melt together with the butter in a bowl over a pan of simmering water, stirring frequently.
Take the bowl off the heat, leave to cool for a few minutes and then add in sugar and then your eggs one at a time.
Then add in the vanilla. Sift in the rest of the dry ingredients and fold together.
Then carefully fold in your chopped candied ginger, saving some for the top.
Pour into a non stick or greased and lined 9 inch square cake tin and sprinkle over the rest of the ginger. Bake in the oven for 15 minutes.
Wednesday, 18 May 2011
Elderflower Fritters - version 2
It's elderflower season!
Well strictly speaking it isn't but the whether has been so warm lately that elderflowers are blooming nearly more than a month early. I know this because I made fritters in late June last year.
They were so good that I couldn't wait to get my hands on some more this year, so I am glad they are early.
Elderflowers grow almost everywhere so you shouldn't have too much trouble finding your own in the countryside. I am lucky, I have a tree in my garden!
I am waiting for some more to bloom so I can make cordial too. So check back for a post on that.
Last time I made fritters they were nice but the batter was a little dense and my technique wasn't so great so they weren't all that pretty. I replaced some of the milk for sparkling water this time around, giving them a light batter, much like you would use for tempura.
Elderflower Fritters - serves 2 / makes 6 fritters
6 heads of elderflower - checked for bugs
50ml of milk
100ml of sparkling water
100g of self raising flour
pinch of salt
1/2 teaspoon of baking powder
1/2 teaspoon of vanilla extract
1 egg
ground nut or sunflower oil for frying
Use your elderflowers as soon as you've picked them, if left too long they start to smell strange and lose their floral scent. Check them for any bugs but do not wash them otherwise you'll lose all the lovely pollen, which is where the flavour is.
To make your batter mix together the milk, water and then the egg. Slowly whisk in your flour, salt and baking powder until you have a loose batter - the consistency of single cream. Add more water if necessary.
Heat about 2-3 inches of oil in a large saucepan. Pop a bit of batter in after about 2 minutes to check if it is hot enough.
Dip your elderflower head in and twist slowly to make sure it is fully battered, then pull out and let the excess batter drip off. Carefully put into the hot oil - if you keep the stems long when picking you will have something to hold on to. Fry in batches for a few minutes until golden brown, drain on kitchen paper.
I like to serve them drizzled with honey and with a scoop of ice cream.
Monday, 16 May 2011
Lemon & Ricotta Breakfast Muffins
I called these muffins so you can eat them for breakfast.
I am kind to you like that.
I made these for three reasons.
1. I had a lot of lemons
2. I wanted to test out my new silicone
3. I like to eat cake for breakfast.
On a serious note, they do have much less sugar than a cupcake, and of course no icing or buttercream -they aren't particularly sweet, so add more if you want a sweet muffin. They are lovely split open and served with some natural yoghurt and honey.
Lemon & Ricotta Muffins
makes 12 muffins
1 cup (200g) of self raising flour
1/4 (50g) cup of sugar
half teaspoon of baking powder
pinch of salt
2 tablespoons of honey
1/2 (100g) cup of ricotta
1/4 (50ml) cup of milk
3 tablespoons of melted and cooled butter (approx 75g solid)
1 egg
zest of 3 lemons, juice of 2
oats or wheatgerm to sprinkle on top - optional
Preheat your oven to gas mark 4 / 180c / 160c fan.
Mix the dry ingredients together in a bowl. Do the same with the wet ingredients and the egg, whisk them together. Slowly fold the wet into the dry, taking care not to over mix.
do you like my silicone cupcake liners? fancy and useful.
Sprinkle with some oats or wheatgerm if you'd like.
Bake for 15 - 20 minutes until they are cooked through.
Subscribe to:
Posts (Atom)